Showing posts with label Edibles. Show all posts

Friday, 25 January 2013

Fridge Door Project - Local Sorrel Drink

Sorrel Drink


It's been awhile since I've posted an addition to my fridge door project. The problem hasn't been that I haven't been making anything, it's just that I'm still tweaking some of the things I have made. If you deem the newest jar of pickles too vinegar-y then you still have to finish them before making a new batch. Or at least that's how we roll.

Fortunately for you guys (and our taste buds) this one turned out pretty darn great the first time. I'd been trying to decide how to replace the sugar-y corn syrup sweetened juices in the fridge door. There's usually a bottle of cranberry and a bottle of pink grapefruit in there. We don't often drink either straight, but we'll mix in club soda to dilute them. I don't have a juicer nor did I want to start the habit of handing over a large percentage of our grocery budget to expensive fruit. Is fruit expensive everywhere? I always feel like it's crazy expensive here. And then wandering around at the Bordeaux Fair last weekend with my go-to local sorrel drink in my hand, I was all like duuuh! So I hightailed it over to the nearest stand with a pile of the dried red flowers and started asking questions. "A pound of flowers will make about two gallons of drink." "They're five dollars per pound." "It takes about ten minutes." "You add whatever spices you want."

Sold.

Half a pound of sorrel flowers came home with me that day.

sorrel

Now, as well as I've been told, sorrel is a type of hibiscus but is not the pretty hibiscus flowers you always see in pictures and around the island. It is the same "hibiscus" that is in tea and other drinks, but they fool you by putting a picture of a more familiar flower on the label. That's how it has been explained to me. Seems like it's likely true because in my ten years I've never observed anyone cooking those pretty flowers straight off the bush in their front yard.

ingredients

What I love about sorrel drink is that it's heavily spiced. It's the complete opposite of all the sweet fruit juices you normally associate with the Caribbean (pineapple, guava, mango). I might continue to play around with the spices in the future, but I was pretty happy with what I decided on for my first batch. Everyone I asked at the fair said cinnamon and cloves were a must. Allspice might be good too, but I didn't try it. Google tells me ginger is a staple of the Trinidadian version. I went with a stick of cinnamon, five cloves, and four strips of orange zest.

Tear the petals off of each flower (as you see above). You don't need the seeds, only the petals. They don't dye your fingers red as I was fearful they might. Fill a pot on the stove with water and drop in the spices. Bring it to a boil. Once it's boiled, drop in the petals and turn off the heat. It quickly goes from this:

boiling water

To this:

steeping

Now you just let it sit and steep. I was originally told ten minutes but it was too weak for me at that point. I wound up letting it steep for twenty minutes, heating it back to a boil, and then steeping for another ten minutes. 

When you're satisfied with the taste, sweeten to your liking. Pour through a strainer and throw away the solids. Enjoy over ice! I definitely found that this tasted even better the next day but it was still great day of. Next time I may increase the amount of sorrel I put in to make it stronger and better to mix with club soda, but for now we're happily drinking it on it straight up.

Sorrel Drink


Sorrel Drink
Locally on St Thomas you can buy sorrel at farmers markets and occasionally I see dried packages of them at Fruit Bowl. Elsewhere, check the international section of your grocery store. The Caribbean, Mexican, or African sections may have them dried in bags. Or you can just find them on Amazon.

The amount of sorrel you use per gallon of water is up to you. I started with 1/2lb and will probably increase it for my next batch for a stronger drink.

1/2lb-1lb sorrel flowers
1 gallon water
1 cinnamon stick
5 cloves
4 strips orange zest
sweetener of your choice (I used 3/4 c. fair trade sugar)

Pull the petals off of the flowers. Throw the seeds away. Put your spices in a pot with the water and bring to a boil. When water is boiling, turn off heat and add the sorrel petals. Cover and let stand 15 minutes. Taste and if drink is too weak, bring water to boil again, turn off heat, and allow stand another 15 minutes. Continue until flavor is to your liking. Add the sugar. Pour into a pitcher through a fine mesh strainer, discard solids, and serve over ice.


More from the Fridge Door Project:

Currently working on:
- Garlic Dill Pickles
- Tomato Jam (which I prefer over ketchup)
- Berry Jam

Friday, 14 December 2012

Spiced Rum

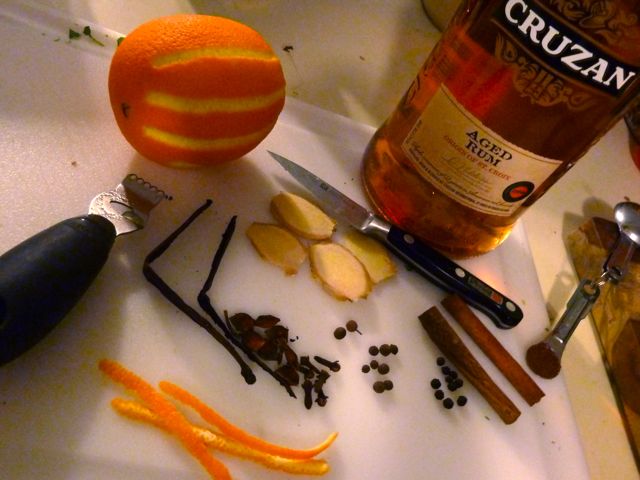
I always try to make something yummy for good friends around Christmas. A few years ago it was peppermint marshmallows. Last year it was cinnamon buns. This year Seth and I tried our hand at homemade spiced rum. It was a grand experiment. We figured if we're living in a place where we can buy a handle of yummy local St Croix rum for less that $11, why would we not? How did it take us so long to come up with this idea?

We did it together on one of our Thursday date nights. Our hope is to keep tweaking the recipe and make a secret Rogati spiced rum. You know, the kind where friends and family are all "I hope I get a bottle of the special Rogati rum this December. I look forward to it all year long!" But for this first year we stuck with the Serious Eats recommendations: vanilla bean, orange zest, ginger, cloves, cinnamon, star anise, allspice, nutmeg and pepper. Almost all stuff we already had at home. Seemed like a safe way to get started.


I was actually kind of bummed to empty the bottle into individual gift bottles when it was done steeping. So pretty.


Friday, 7 December 2012

Potato Pizza

Awhile back I read a about potato pizza out on the interwebs. I'm one of those people that accepts almost anything on flat bread and thinks it's pizza. Seth is of the variety that red sauce and cheese make a pizza. But potatoes? And bread? Together? How could this starch-fest not be amazing. So I finally got around to making it last week.

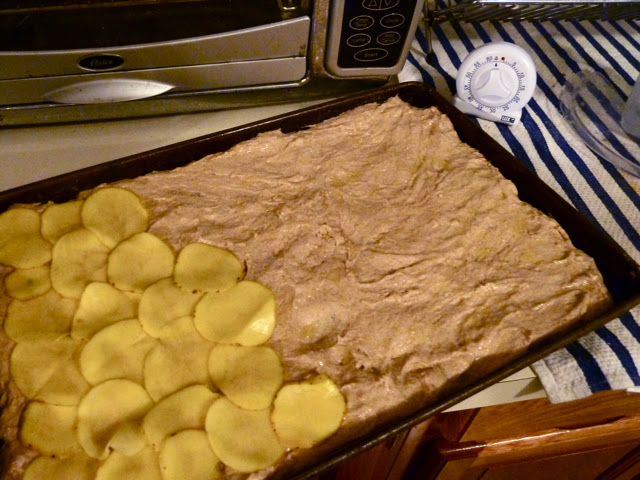
I started with making a batch of my foolproof pizza dough. The same time I made that I used my fancy-pants mandolin (thank you Discover points!) to slice up three potatoes on the 1/8 inch setting. After referring to about 82 recipes to get my bearings, I threw the potatoes into an icy salt water brine and let them soak for the 1 1/2 hours that the pizza dough was rising. Then I stretched the dough out on sheet pan and layered the potatoes on top.


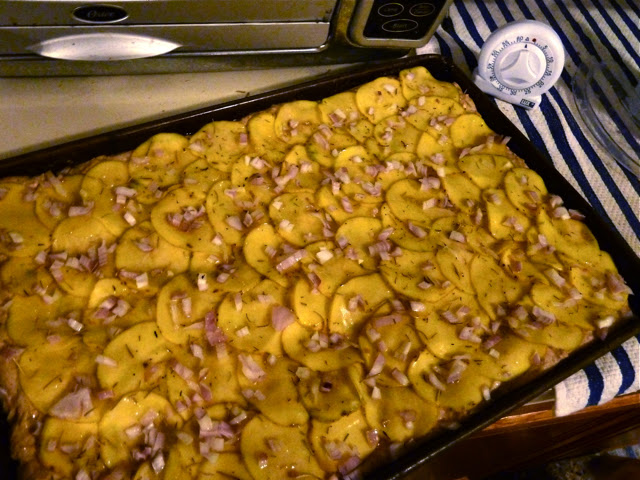
Sprinkle on chopped onion and rosemary, spritz with olive oil, and voila!


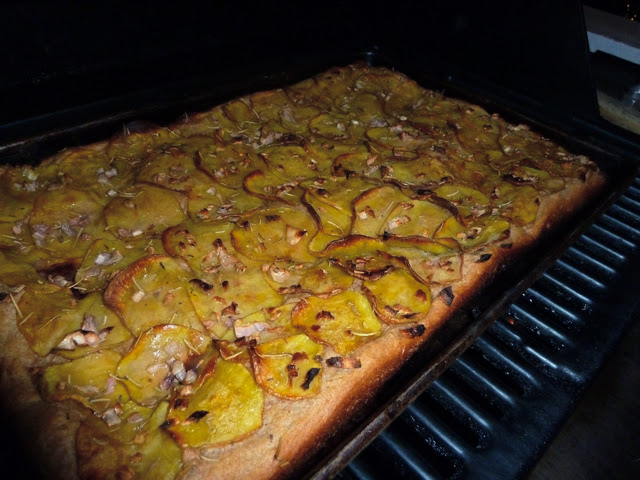
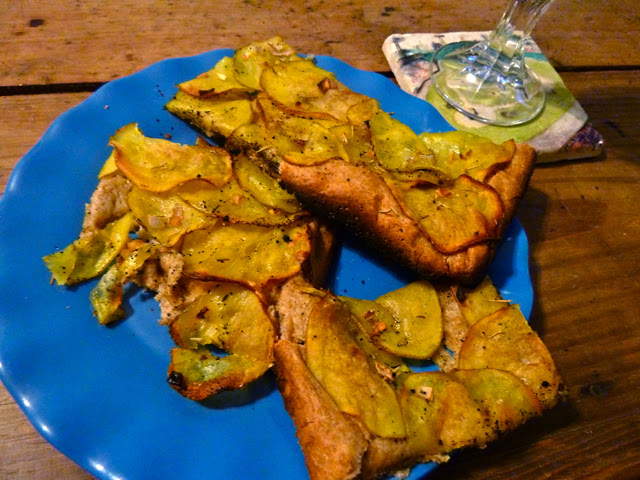
Now, we usually grill our pizzas. Jacking our oven up to 500F in our tiny open-air Caribbean kitchen makes for a very unhappy, sweaty, "I swear I'm never cooking again" Melissa. But we can crank the grill up to the same temp on the back porch and continue living a happy life. So why not go that same route for potato pizza? It's looks fabulous and golden brown right?


Well, let me tell you why not. Because in an oven the pizza would go on the middle or top rack. But on the grill it is directly above the heat. So after you cook it the full 30 minutes to fully cook the potatoes (most pizzas are on there for only 10-12 minutes) you get all excited. You're salivating. It smells delicious. You can almost taste it.

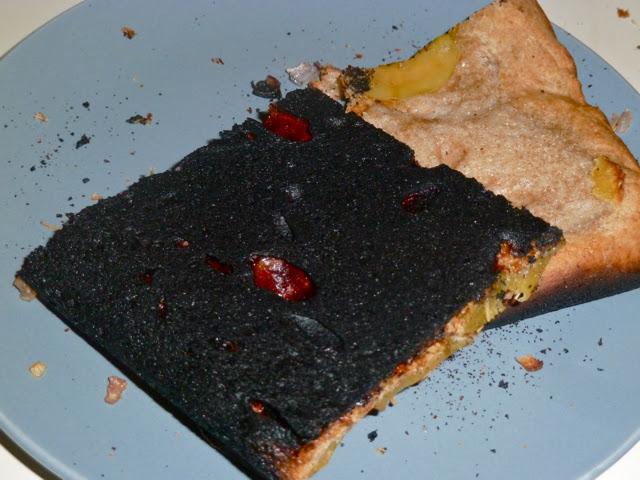
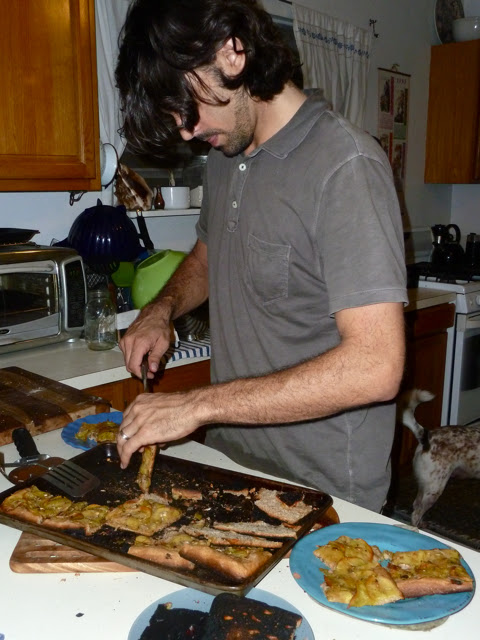
And then you cut it. And it's sort of extra crunchy. And you lift it out onto the plate. And this is what was going on under that golden potato top:


Awesome. So here you are at 9pm with nothing to eat. Nothing! And you go sit down on the couch with a glass of wine and pretend you're not even hungry and you never heard of potato pizza and, I mean, who really needs dinner anyway? But then if you're a lucky girl like me, Seth gives you a hug and silently starts sawing the toppings off of the black cement crust. Piece by piece.


Until you both have a plate of sliced grilled potatoes with some crusty parts to go with your wine. Glorious. They were good.


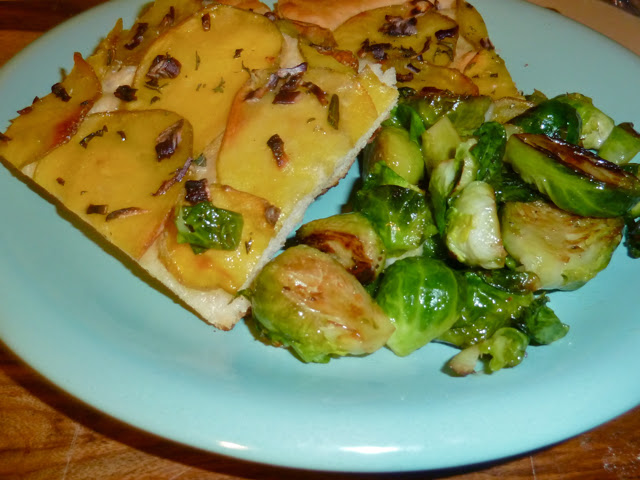
Then a week later you find the time to rally. You try again. This time you tweak it and use red onion (not shallots) and fresh rosemary (not dried) from the plant you just bought that will likely die when you leave to spend Christmas with family. You pick a cool evening (I mean, it's got to be, what, 83 degrees?) so that you can crank that oven up to 500F and you put the pizza on the middle rack. You even use only 2/3 of the pizza dough for a thinner crust, leaving you with a ball of pizza dough in the freezer for another day. And you braise some brussels sprouts.

Yes.


Potato Pizza

1 recipe of my pizza dough
3 medium potatoes, sliced evenly into 1/8" slices or thinner
1/4 c. diced red onion
2 Tbsp. minced fresh rosemary
1/4 c. kosher salt
olive oil

Make the pizza dough and slice the potatoes at the same time. While the dough is rising, brine the sliced potatoes in a salt water bath for 1 1/2-2 hours. (I use about 1/4 c. kosher salt in a large mixing bowl of ice water for the brine.)

Heat the oven to 500F. After the dough has risen, spread 2/3 of the pizza crust out on an oiled sheet pan with raised edges (mine was 12'x21"). You can wrap the remaining 1/3 of the pizza dough tightly in saran wrap and keep in the freezer or fridge for a small pizza later. The dough should spread into a thin layer. Spritz it with olive oil. Drain the potatoes in a colander and press out the excess water. They should be limp and squeezable. Blot them dry with a paper towel and layer then thinly on the crust. Sprinkle with the onion and rosemary. Drizzle olive oil over the top. Bake on the middle rack for 30 minutes until the potatoes are golden brown. Check halfway through cooking and move to the top rack if you think the bottom of the crust is getting too much heat. Sprinkle with salt and cut into squares. Makes 4-6 servings.

Wednesday, 28 November 2012

Bourbon Pumpkin Pancakes

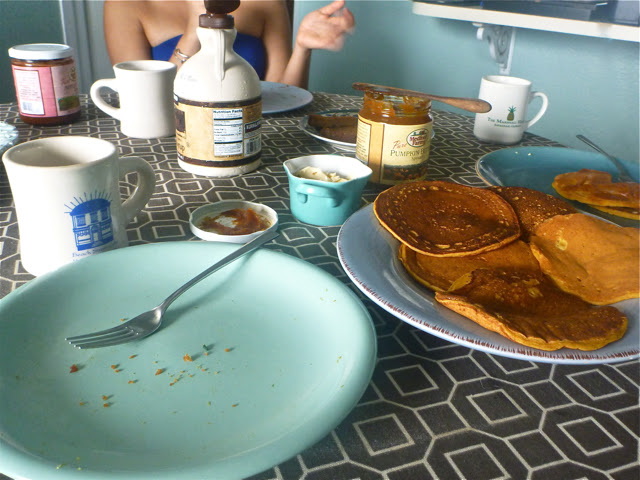
On Sunday some friends came over for a low-key late brunch. I had no idea Seth had mad pancake skills when I married him. But he does. Bonus! They're one of his favorite things to make. Our brunch featured Seth's trademark pancakes, which we gave a facelift so that they'd feel post-Thanksgiving appropriate. Pumpkin? Check. Bourbon? Always check.


I sort of went all zombie on my pancakes as soon as they were in front of me, eating without thinking. Then I finished and was like "picture. duh." But a picture of a clean plate probably tells the story better than a full one would have.


Bourbon Pumpkin Pancakes
These pancakes are meant to be thin and light. (The better for eating more, I say!) Also, don't expect the pumpkin flavor to hit you upside the head. We didn't want to feel like we were eating pumpkin straight out of a can. They are great with other fall flavors like maple syrup or pumpkin butter.

3/4 cup milk
1 cup pumpkin puree (canned or home-roasted)
1 cup plain yogurt
3 Tbsp bourbon
4 Tbsp neutral oil (we used safflower)

2 eggs
1 cup whole wheat flour

1 cup white flour
1 tsp baking soda
1 tsp kosher salt
2 tsp baking powder

Combine all liquids in one bowl, beating eggs in with a fork. Sift all dry ingredients together in a large mixing bowl. Slowly add wet ingredients and stir together until combined. Heat a frying pan or griddle on low/medium heat and add a little oil to keep pancakes from sticking. Using a 1/3 cup measure, drop batter onto the hot pan and use the bottom of the measuring cup to quickly spread the batter out a little. Let it cook on one side until air bubbles start to form on the top. Flip and continue cooking until bottom is golden brown. Transfer to a plate and continue with the rest of the batter. Makes enough pancakes for 4-6 people.

Wednesday, 17 October 2012

Cold Noodles for Hot Days

I had a whole Smart Closet post lined up for Monday but the pictures I took over the weekend turned out terrible. All dark and fuzzy. We left our camera cord at my parents in August (during their move) and my dad just unearthed it last weekend from a mountain of boxes. In the meantime we've been using our outdoor/underwater camera. This thing is great for underwater pictures of sea turtles or jumping off of rocks with but not so much for anything indoors. Hopefully we'll get the cord soon and the problem will be remedied.

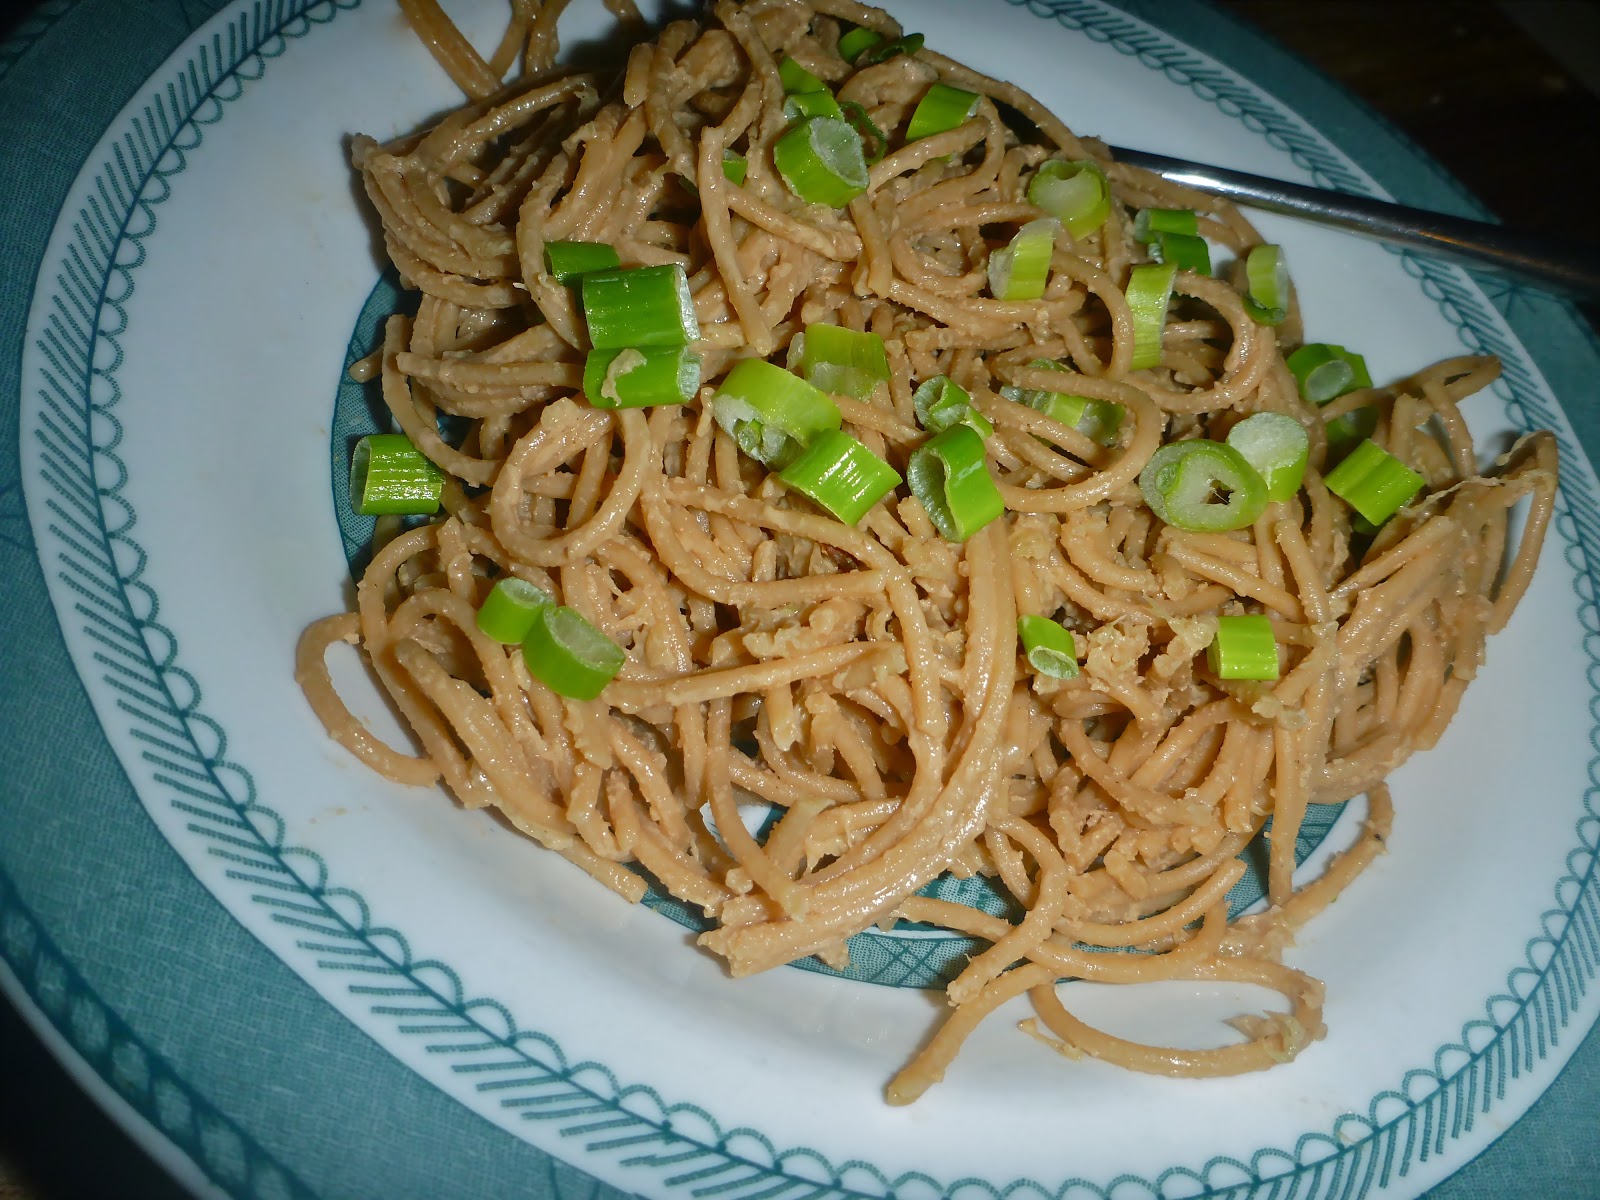
In other news, it has been H-O-T here on St Thomas. During one of my many recent whine-fests to Seth about having to cook in the heat, I remembered a recipe from my favorite Mr. Mark Bittman for a cold noodle dish. It cooks up in less the 30 minutes (less time in a hot kitchen) with stuff that I usually have around and it's meant to be eaten cold straight out of the fridge (although I'm sure you could heat it if you like). It's been on repeat while we wait for December to arrive and the heat to take a few months off.


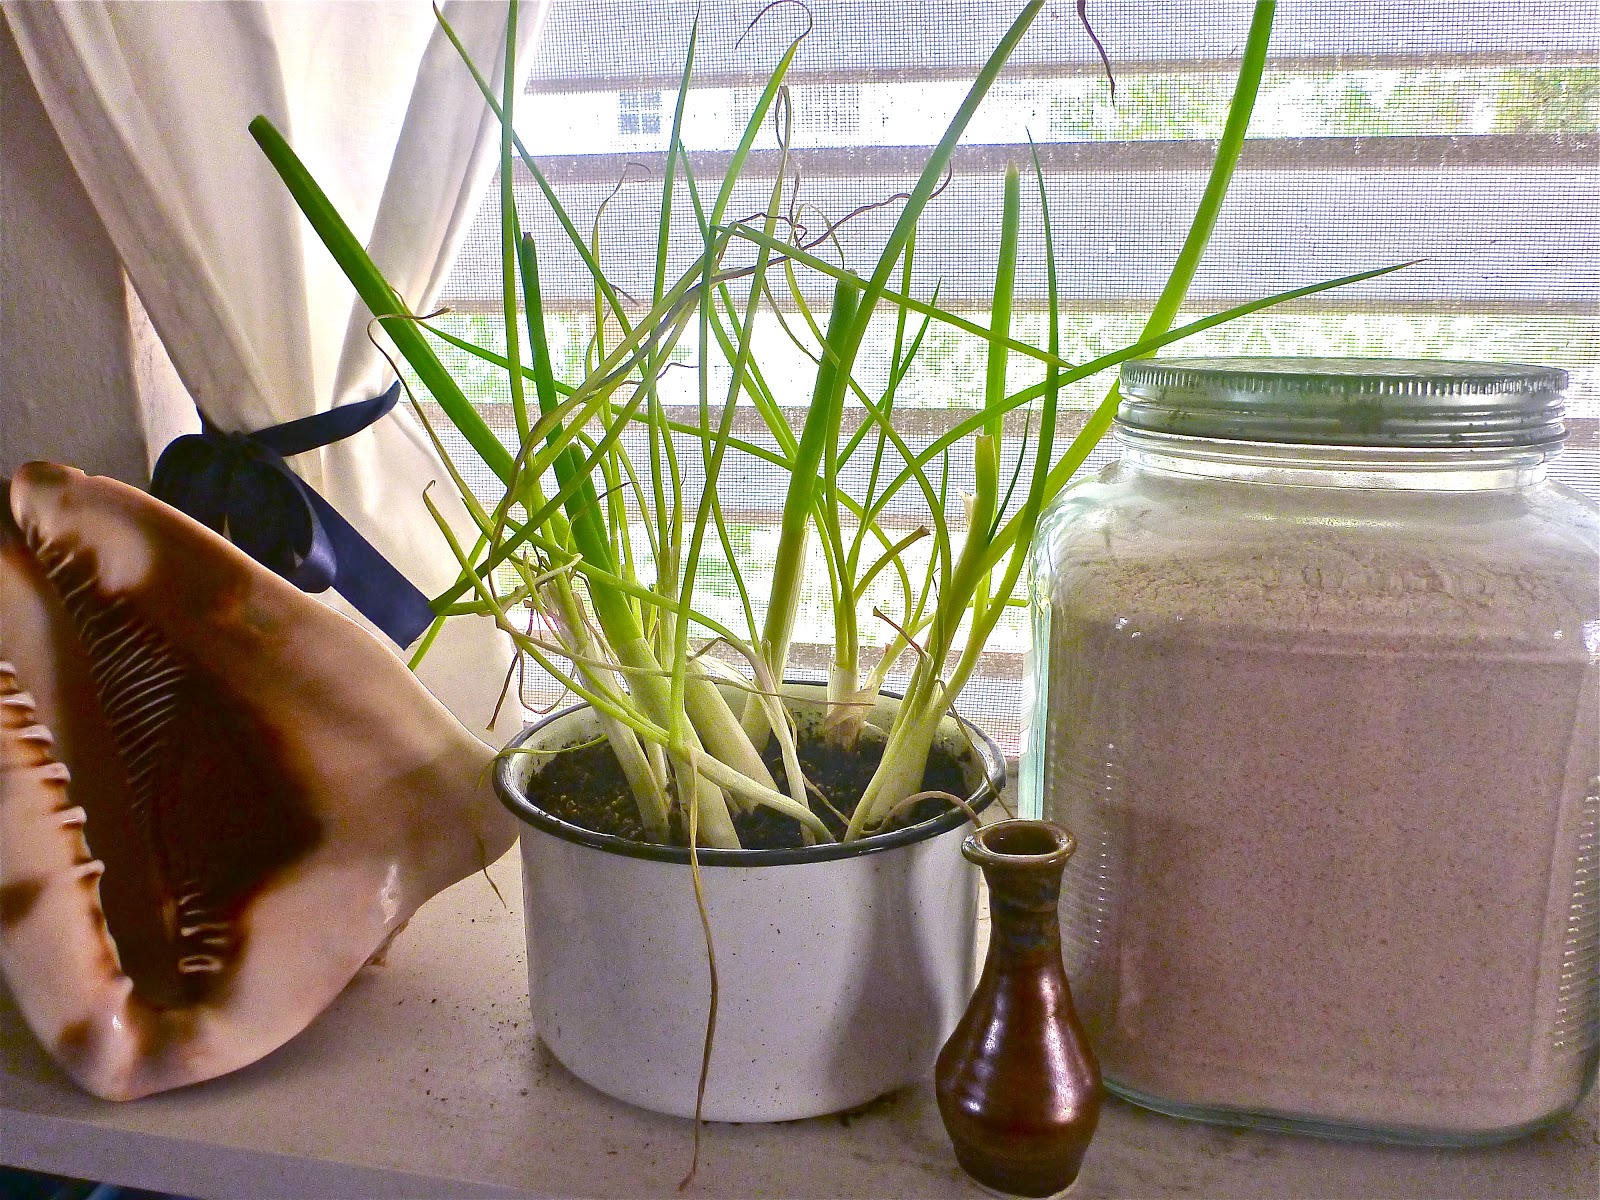
Also, I know this tip has been all over Pinterest lately, but we've been growing our used scallion roots instead of tossing them for years now. An old landlord, a guy from down island in Dominica taught us how. When you're done with the scallions you bought at the store, stick the roots in a little pot of dirt and let them grow on your windowsill or outside. Cut off what you need when you need it. You'll never be scallion-less again!


Cold Sesame-Peanut Noodles
(You can use entirely tahini or peanut butter to change up the taste, just make sure the amount you put in totals 1/2 cup. Cashew butter or almond butter would probably be good to if you have them on hand. I've also substituted both apple cider vinegar and ume plum vinegar for the vinegar in this recipe. For you carnivores, feel free to grill up a chicken breast with salt and olive oil to toss on top.)

1 lb (thin!) spaghetti noodles (this sauce is hearty enough for whole wheat noodles)
2 large cucumbers (they cut the heaviness of the sauce)
1/4 c. tahini paste
1/4 c. peanut butter
2 Tbsp sugar
2 Tbsp dark sesame oil
3 Tbsp soy sauce
1 Tbsp rice or white whine vinegar
1/2 c. chopped scallion to garnish
salt and pepper

Optional add-in: minced fresh ginger, tabasco sauce, crushed peanuts, cilantro, chopped baby spinach

Get your water started and boil your noodles. While the water/noodles are going, peel the cucumbers, slice them in half lengthwise, and scoop out the seeds with a spoon. Grate the cucumbers either by hand or with a food processor. Stir together the tahini, peanut butter, sugar, sesame oil, soy sauce, vinegar, and ginger or tabasco if you are using either. Scoop out about a 1/2 cup of pasta water and add to the sauce until a little thicker than cream. Toss in the cucumber and stir up. When the noodles are done, drain them and rinse under cool water until they are cool. Dump them into the bowl with the sauce and cucumber and stir until fully mixed. If the sauce is too thick, add a little more of the reserved pasta water. Stir in peanuts, cilantro or chopped spinach if you're using any of them. And voila! Serve some noodles up cold in a bowl and sprinkle with scallions.

Update 10/20/12: A friend asked about protein in this dish. If you wanted to up the protein quotient, edamame would be a quick and easy item to toss in. Our freezer usually has a bag of frozen pre-shelled edamame. Follow the instructions on the bag (usually just tossing them into simmering water for a few minutes) and then mix in with the pasta when you add it to the sauce. 

Monday, 1 October 2012

Tomato Jam, my bad...

Warning: This is a completely unhelpful post. I tell you about something awesome and then don't share with you how to get it. Just wanted to be clear about that.

Remember a few months ago when I told you about "wasting" a whole lot of tomatoes and an entire Sunday afternoon making 5 pints of tomato jam that weren't worth eating. Well, I take it back. It's not that the jam wasn't worth eating. It just wasn't what I expected. And now that I've gotten over my disappointment due to the wrong expectations, the jam is delicious. We eat it several times a week. Usually on toast with an egg on top.


Our creativity stops there. Because that's really all we want out of it. Just a quick meal or an lazy Saturday morning breakfast. A way to dress up an egg on toast. And boy does it dress it up. Best mistake ever! So I thought I'd pass along the recipe. And then I realized that because I was originally so angry at the jam for not being what I wanted it to be that I didn't save the recipe. Going to have to do a whole lot more searching to figure out where it came from. Sorry. But don't worry. I'll be sure to find it before the jam we have runs out. It's too good to not have on hand!

UPDATE 1/25/13 - Found the recipe! We still have about three small jars of the original batch to finish up. Then I'll make more and post the recipe.

Monday, 24 September 2012

Cookbooks - My Essentials

A few weeks ago when I was in Virginia, I got to hear about the adventures of a sweet friend of mine. She recently moved her life to a teensy island in the Bahamas, much like the one I lived on for a few years straight out of college. It was fun to hear about her life there because it was almost like someone telling me my own story all over again.

One part of her life that came up was how boring the food was. The store only offers the same basic items. Anything beyond those is either too expensive for regular consumption or completely non-existant. I remember filling my suitcase with sesame oil and cumin during trips stateside to take back to my island with me. Fortunately I made two good friends that really took my hand and taught me the ropes of how to feed myself well on an island. One was an American woman who wintered down there in a home only a few minutes from mine. The other was a German vegetarian who lived there because her husband was Bahamian. They helped me see how much you could do with the twelve available vegetables (some fresh, some canned) and locally caught fish. One taught me to think out of the box. The other taught me to read cookbooks.


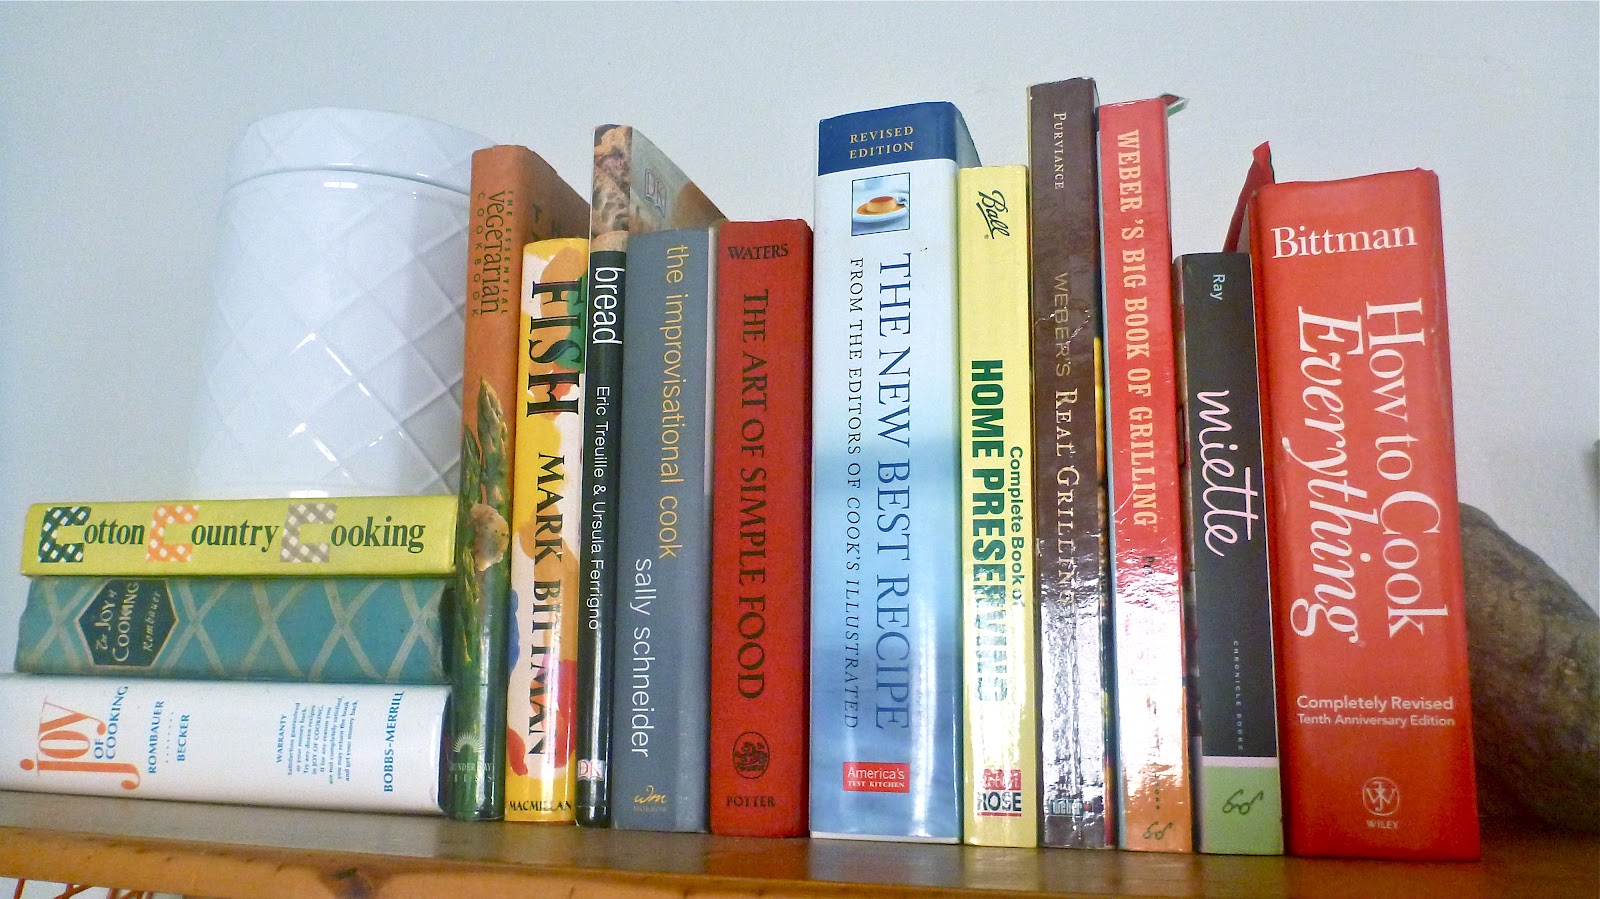
I've got a number of cookbooks on my shelf. I actually have a few more tucked away in a cabinet, but these are the ones I reference the most. Honestly, with food blogs being so easily accessible they're more than I need. But if I had to tell someone who was learning to cook from scratch (on a teeny tiny island with limited options) what to get here are my top picks:


1. Mark Bittman's How to Cook Everything - I'm 100% certain you could live with this as your one and only cookbook. It honestly is how to cook everything (pad thai, meatloaf, apple pie, homemade pasta). But even better than that, it's not organized by meal course (appetizer, side dish, entree, etc.) which was a trait that used to frustrate me about cookbooks when I was a beginner. HTCE is organized by food type. For example, there is a chapter on vegetables and it has every vegetable in there in alphabetical order. Want to know how to cook eggplant? Look it up in the vegetable chapter and find a write up on what eggplant is, how to buy it, how to prepare it, what it's good for, and a few recipes that showcase it. I had the original version but the island heat did something to the glue and all the pages fell out. I replaced it with the Tenth Anniversary Edition and I've loved it just as much. It's so full of information that sometimes I just read it before bed. Try it. You'll be totally inspired to cook up something great the next week.


2. Sally Schneider's The Improvisational Cook - This was one I saw in the St Thomas bookstore and begged Seth to get it for me for my birthday. And a few months later he did. It teaches you how to break down recipes. How do you take a recipe for a lemon thyme jam and come up with an original recipe for tangelo tarts? This book will give you the confidence to try. I created a recipe once for homemade peach and honey jello using the skills and thought process this book imparts. There are a lot of words. It's more of a teaching book. Low on the recipes. But it gets the creative juices flowing.


4. Eric Treuille's Bread - This cookbook served me well for my first few years of baking. It has breads from all around the world broken up by type (yeast breads, enriched breads, flat breads, etc.). There are also a few chapters in the beginning about the bread-making process that would be great for beginners to read through. I can't say I've ever had any bread go wrong that I've baked from this book. (Except pita bread...but I can't even get my Syrian grandmother's authentic pita recipe to work for me.) That being said, I'm wondering if one of Peter Reinhart's books (maybe The Bread Baker's Apprentice) may be more extensive replacement. It may or may not be good for a beginner but if you've already got experience with bread it seems like a good next step. I certainly would not be unhappy to unwrap it on Christmas or for a birthday.


And I've got one honorable mention:


4. Cook's Illustrated's The New Best Recipe - I love Cook's Illustrated magazines. Their recipes can be complicated but they never go wrong. But for $30 a year, I figured why not try out their cookbook instead. It's not a comprehensive cookbook like How to Cook Everything but all the recipes that are in there are the best I've found. Don't make it your first cookbook but if you've already got a good basic cookbook, it's a great addition.

I wish I'd had these four cookbooks long ago when I lived in the Bahamas. Well, maybe not the last one. Too many ingredients I'd have had to import. But first three would have gotten me through a lot of years of grilled cheese sandwiches. I was actually able to borrow the Bread book from my friend Penny when she'd go back to the states every summer. It was a lifesaver when I was craving something other than white sandwich bread. Any cookbooks that you can't live without that I missed?

Sunday, 23 September 2012

Pizza, I Love You.

When I tell people I gave up eating diary the usual response is, "I could never give up cheese!" (Do you know why? It's because it's addictive. I mean actually scientifically addictive.) And I'll admit, the cheese is difficult to pass up sometimes. I've found after forming new habits I don't miss milk or yogurt or even sliced cheese on my sandwiches. What I do hate is saying no to delicious smelly moldy imported cheeses when they're available. (Like at island private school wine tasting fundraisers at the Ritz. You'll probably see me eating cheese there in a few months. Feel free to judge me.) The other difficult food to pass up is pizza. Pizza is hands down what I miss the most. What is it about pizza?

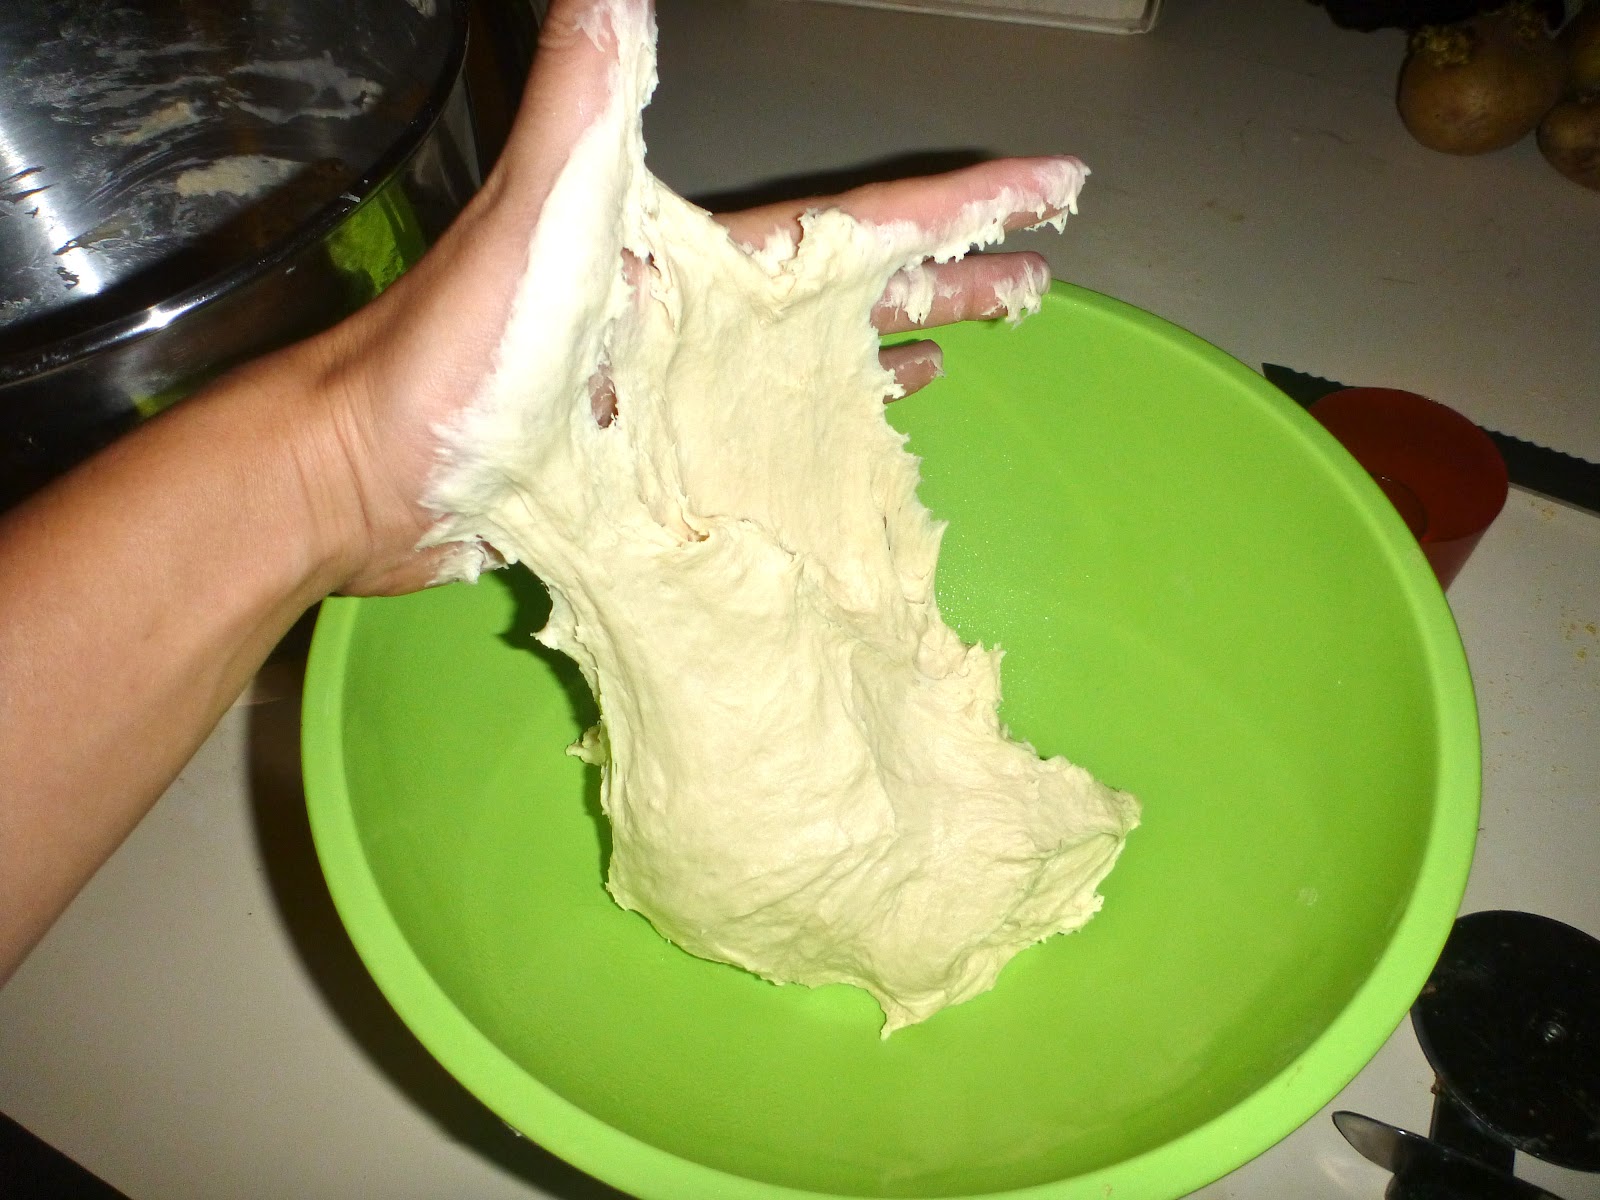
Seth was kind enough to win me Kitchenaid mixer a few years ago. I had been asking for one and he was a little baffled as to why we needed a $400 mixer. (And I didn't really have a good answer either so the matter died.) But then he went and won one kind of accidentally in a Price is Right spoof at a work conference. So I'm sort of a lazy bread maker. I throw things in and let the dough hook do the kneading. This pizza dough is pretty sticky, as demonstrated by my attempted to put the ball into a bowl to rise. But really, that mixer bowl to rising bowl transfer is all the hands-on time required when I use the Kitchenaid.


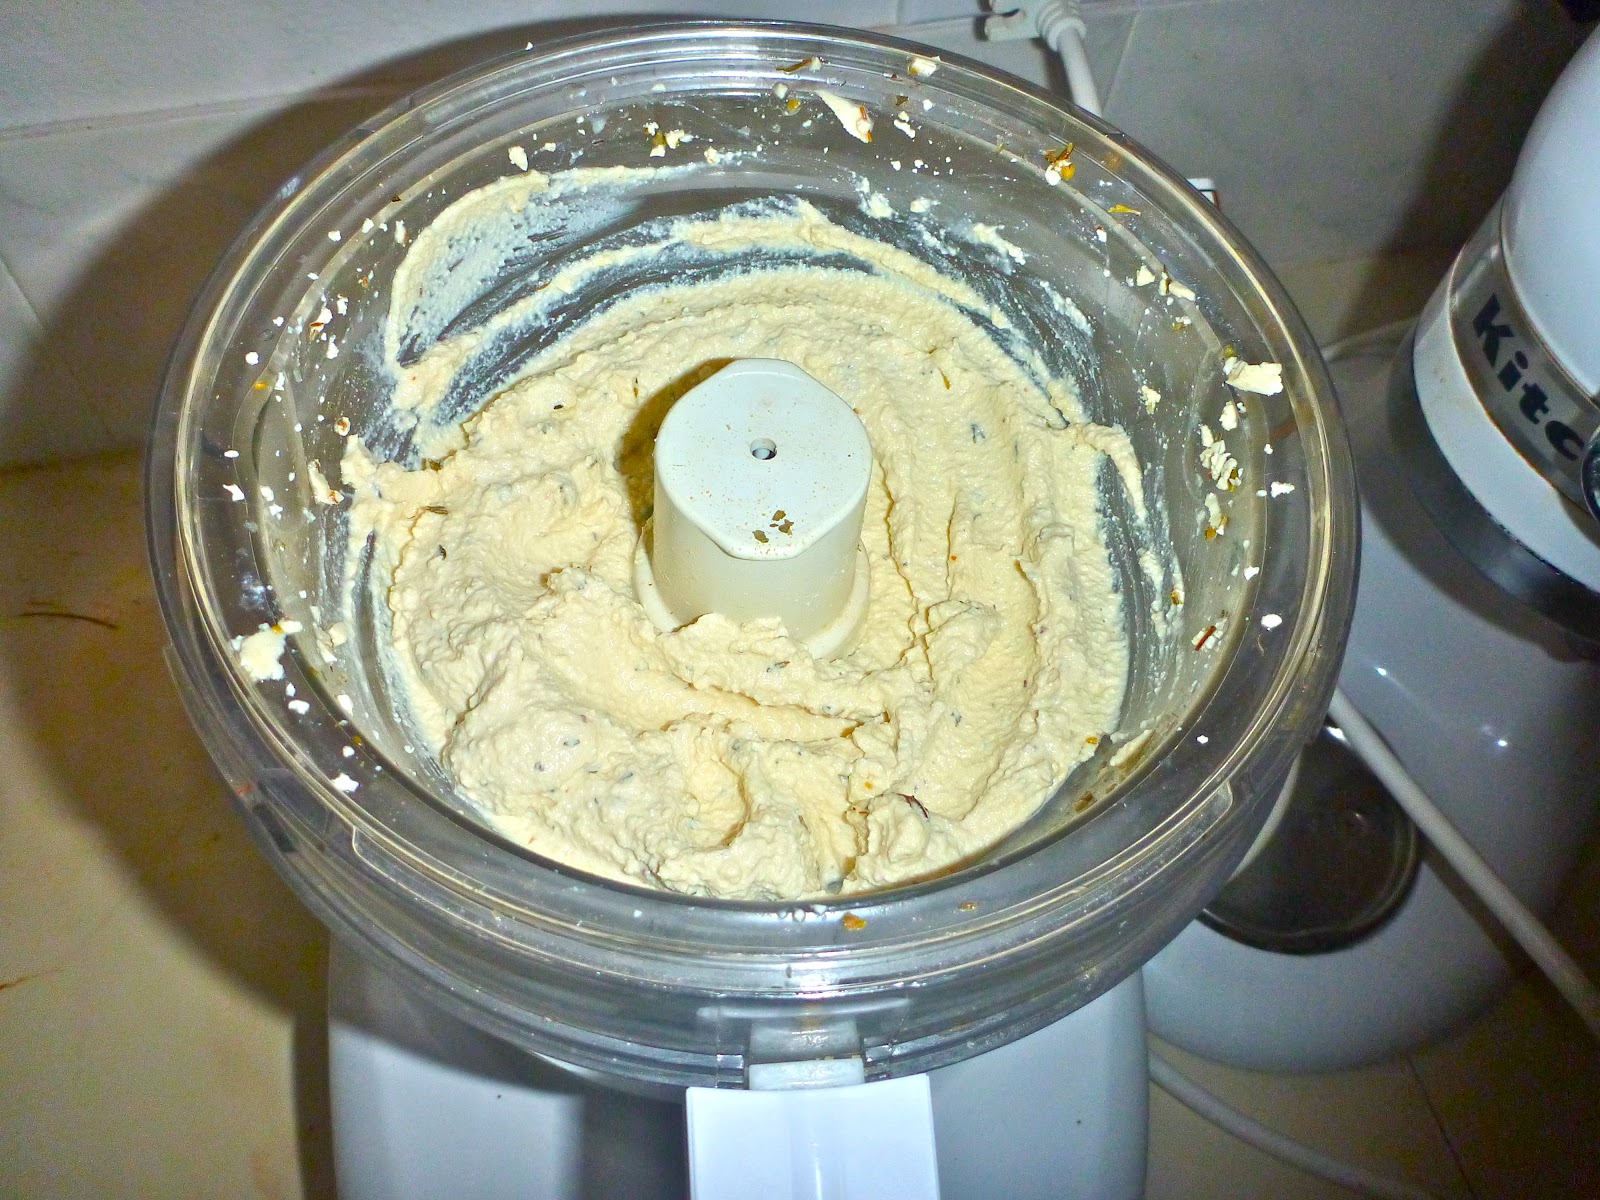
I had half a block of tofu in the fridge waiting to be used, so I mixed up a cheese-like sauce in the food processor. The tofu, lemon juice, nutritional yeast, and garlic blends into something tangy and creamy. Roasted red peppers might have made a good addition too. I'm not saying it tasted like cheese. Just that it was tasty.


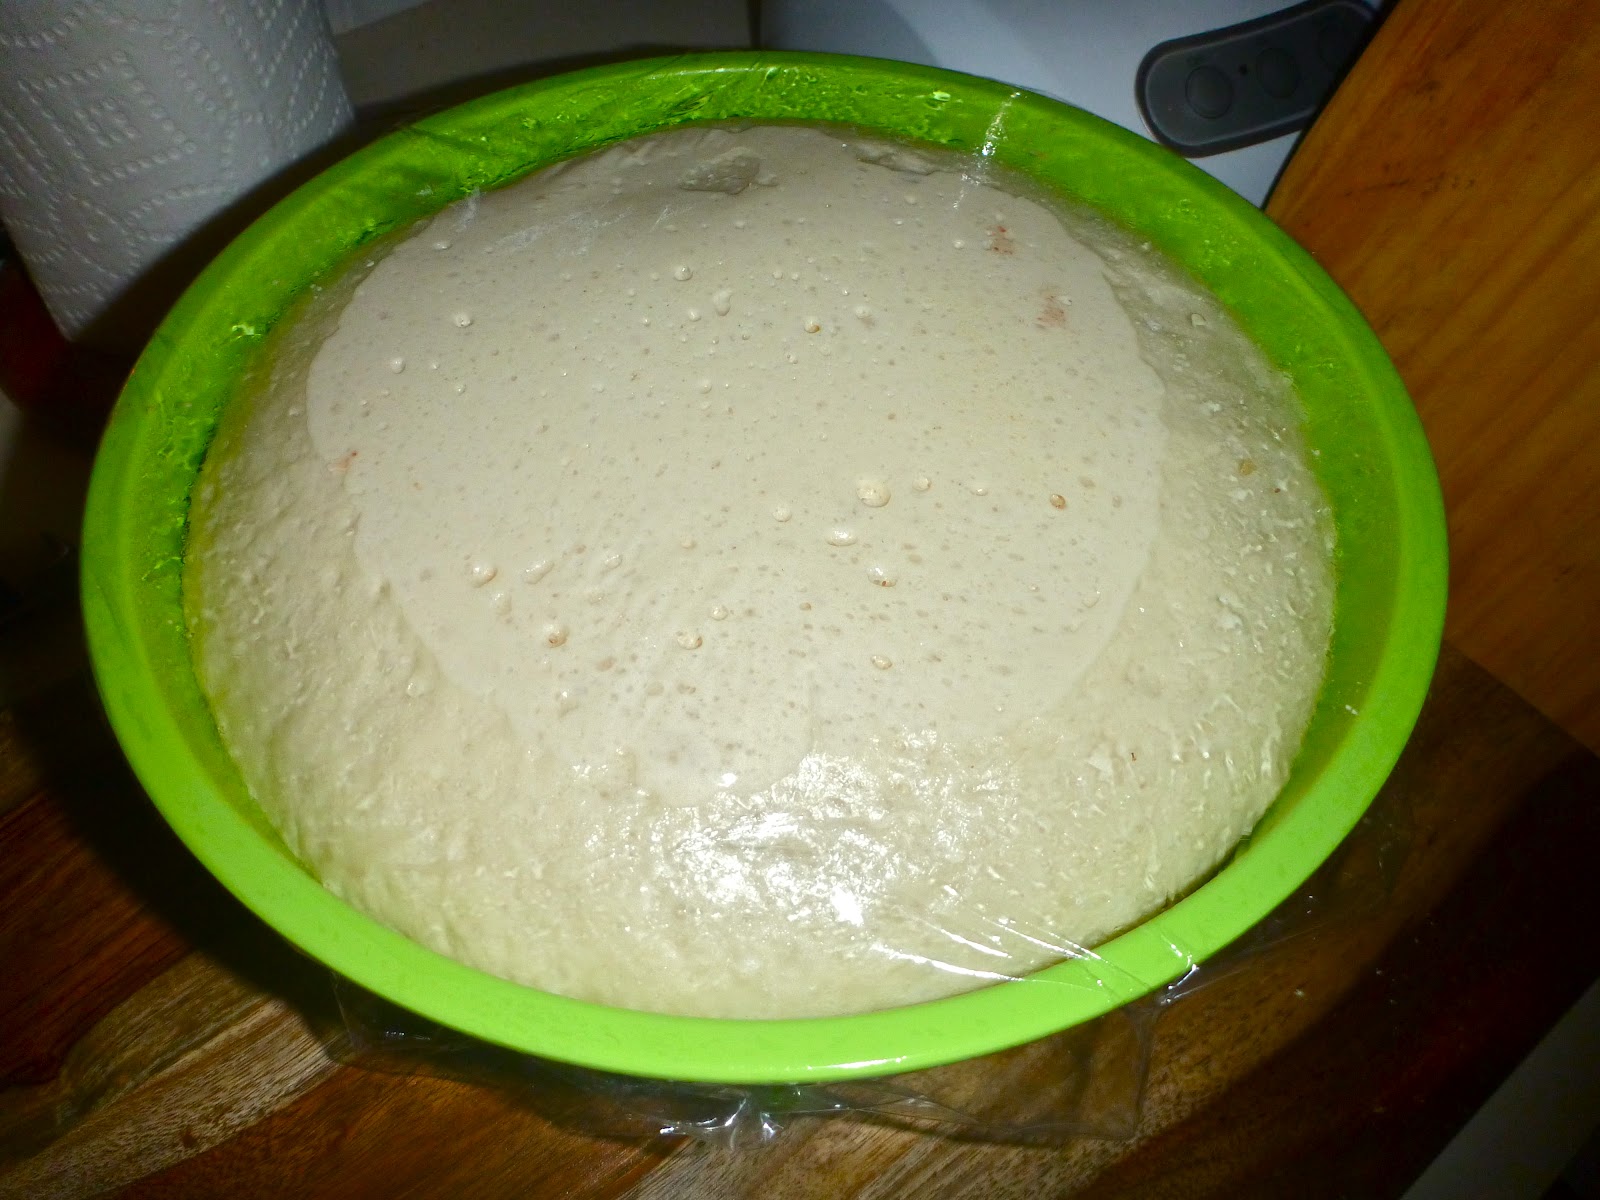
In the disgusting Caribbean heat of my open-air kitchen, it only takes about an hour for pizza dough to rise.


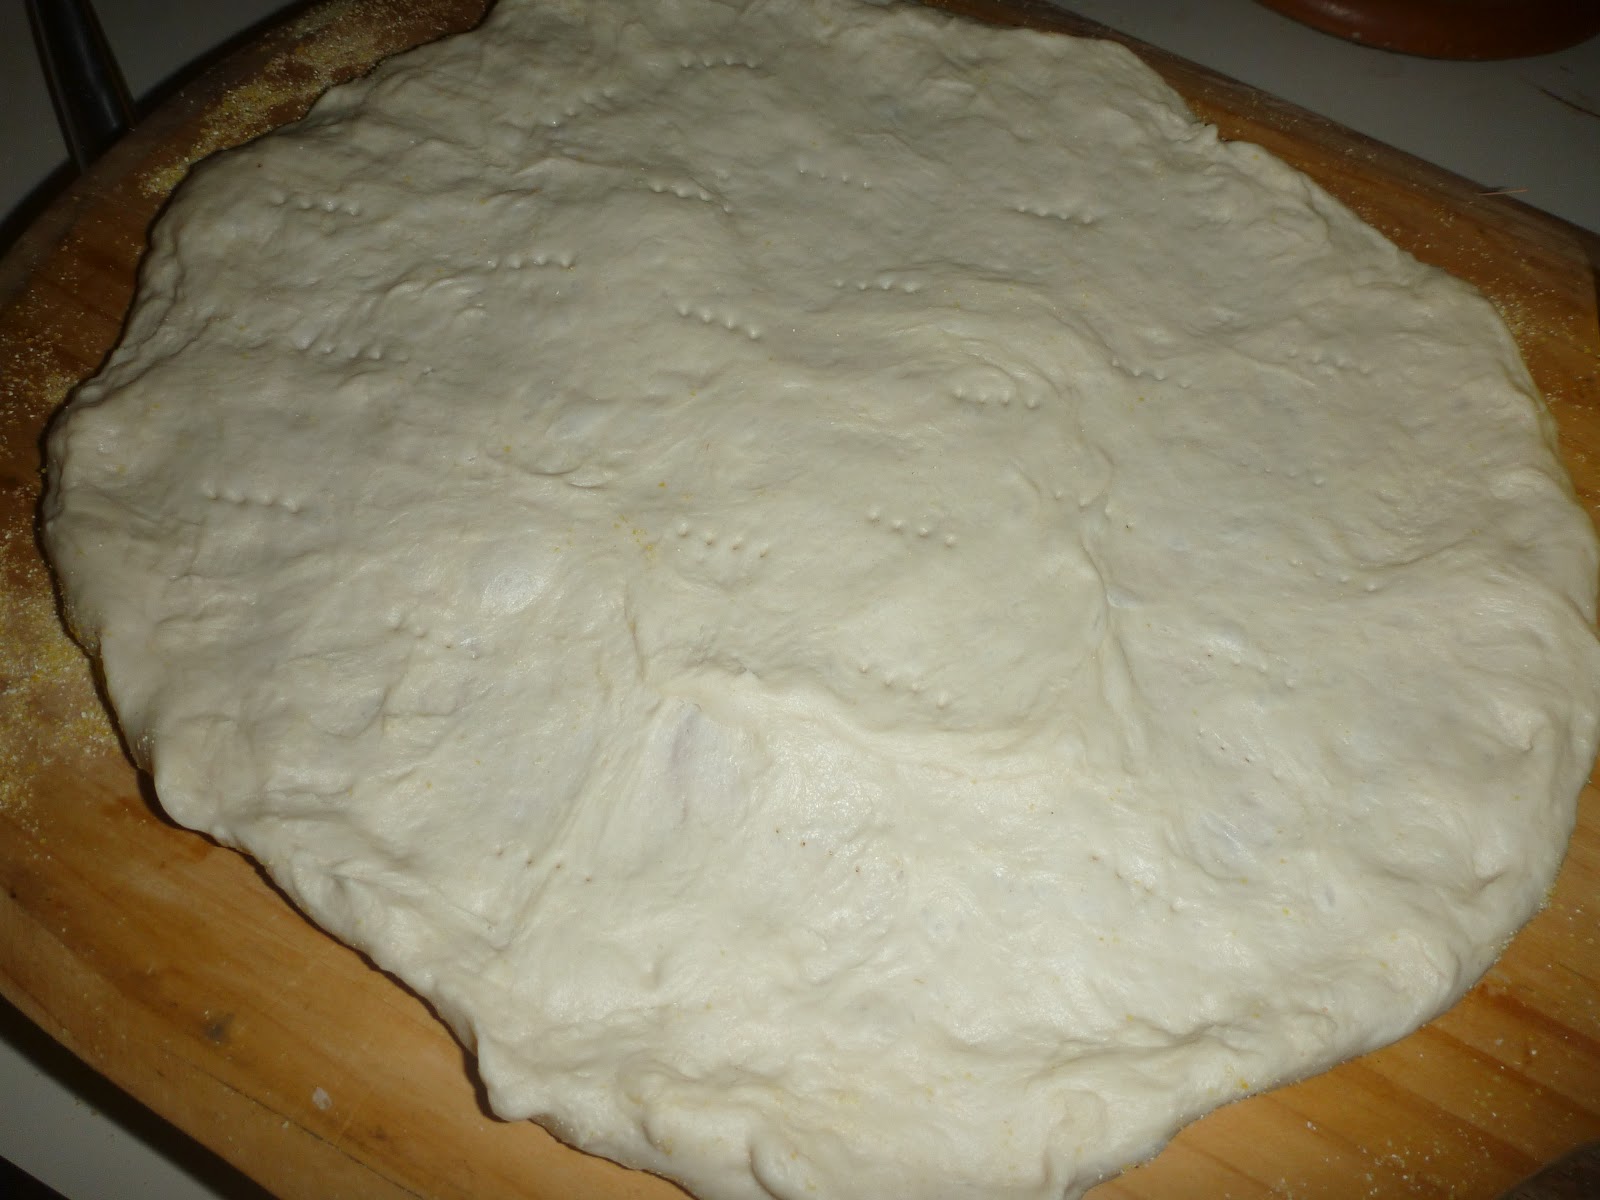
I formed the crust directly on my dough paddle. It was much less sticky after rising. Magic scientific things go during that hour of rising I guess. No need to get a rolling pin dirty. I just used my fingers to slowly stretch it out. The trick to not having it stick to the paddle is the cover the paddle with corn meal. When I've stretch it into a  mostly round circle, I stab (pierce?) it with a fork to keep it from bubbling while it bakes.


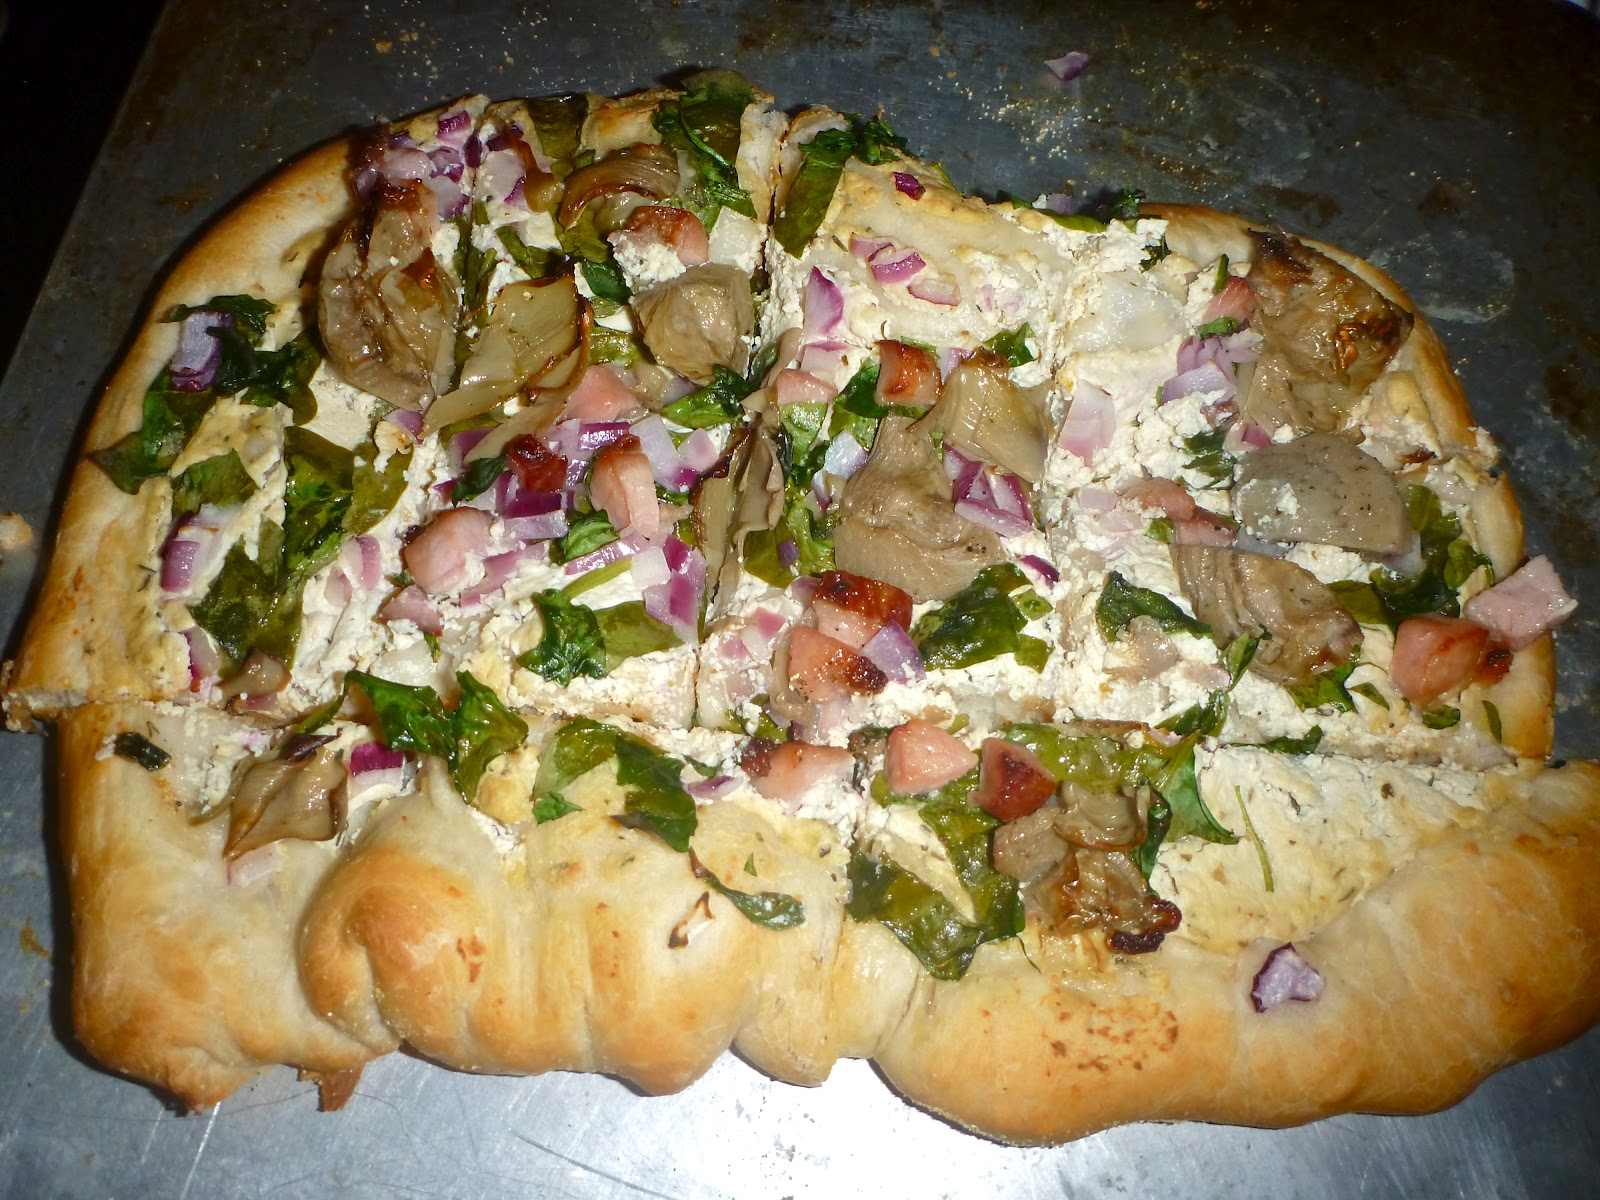
I covered it in my tofu spread, spinach, sliced red onion, jarred artichoke hearts, and walnuts. (Seth says that doesn't count as pizza. I say it counts as delicious.) I spritzed the spinach and onions with olive oil once they were spread out. Then sprinkled on some crunchy sea salt. With sort of a jerking motion, I transferred the pizza from the paddle to the hot pizza stone. Of course I did a kind of terrible job. Half stuck to the paddle. The other half to the pizza stone. With 500 degrees of oven heat blasting into my face I panicked and yelled for Seth. He helped me transfer it completely to the stone and we slammed the over door shut to stop the blistering heat. Then I cried just the tiniest bit because my pizza got all squished up. Seth hugged me and asked me if I realized it was still the same volume amount of pizza squished up as it would be stretched out flat. About 12ish minutes later I get this:


Yum. So good. Other than the crust being extra thick and squishy because of the transfer debacle. I made Seth a tomato-y cheese based version (minus the artichokes and walnuts) so that he wasn't jealous of my pizza.


Pizza Crust - Three 12" Pizzas
(Adapted from a Cook's Illustrated pizza recipe, which doesn't quite work here. Maybe due to climate? Maybe due to altitude? Maybe because I'm bad at this?)

4 1/2 c. all purpose flour
1 1/2 tsp salt
1 3/4 c. hot tap water
2 1/2 tsp. yeast
2 Tbsp olive oil

You want your water to be warm but not hot (or it kills the yeast). Sprinkle the yeast into the water and let it sit for about 5 minutes. The yeast should sort of dissolve and turn bubbly. Mix your flour and salt together in the mixing bowl. After 5 minutes, add the yeast/water mixture and the olive oil slowly and mix together. It turns into a really gooey ball of dough. At the point I let the dough hook do the kneading for about 5 minutes. If you need it by hand, good luck. (If you need by hand, maybe use less flour from the start and add it in gradually as you knead it? You're going to need a lot of flour on your hands and the counter. Your hands are going to be on sticky mess so don't panic. This is a much stickier dough than any other I make.) When you're done kneading, transfer the dough into a large bowl sprayed with non-stick spray. Let it rise for 1 hour if you live on St Thomas and don't have air conditioning. Maybe 1 1/2-2 hours if you live anyplace normal.

After the dough has risen (doubled in size, yada, yada) cover a dough paddle or a cookie sheet with no edges in a thick layer of corn meal. Take one third of the dough and slowly stretch it out on the paddle with your fingers. Use a fork to poke holes in it. Cover it with the sauce and toppings of your choice and bake it in an oven that's preheated to as high as it will go. Typically 450 to 500 degrees F. (If you use a pizza stone, use a quick jerking motion to transfer it from the paddle to the stone. Try not to cry like I did if you mess this up. Crying about pizza doesn't fix it. It just makes you look weak and hormonal.) Check on it in about 12 minutes to see if the crust is a golden brown. If not, leave it in a few more minutes. If it is, use a spatula to help transfer the pizza back from the stone to the paddle.

I cook my pizzas one at a time so there's about 30-40 minutes of high action pizza time going on at the end. If you're on St. Thomas, be prepared to sweat. Have a cold drink handy and be sure to appreciate that any room in your house is now a good 10-15 degrees cooler than your kitchen.


Wednesday, 1 August 2012

How to Peel Tomatoes and Make Ketchup

Why would you care about peeling tomatoes, you ask? Because that's the first step to making your own ketchup! Unless you would rather just buy whole canned tomatoes. But that is far too easy for me. I'd totally grow my own tomatoes but it seems physically impossible to do on St Thomas. In the Bahamas my friend Penny could grow 20-30 tomatoes plants at once. During the winter. It was incredible. But not here. Not St. Thomas. This island gods hate tomatoes and want to stop them at all cost. Someone once told us that you used to be able to grow tons of tomatoes year round. Then a hurricane blew in some sort of fungus that kills them all off before they can finish ripening. Sounds crazy, yes? A hurricane blew in a fungus? But I believe it. You start believing the crazy once you've lived here long enough. And over the last six years we have grown a large number of beautiful tomato plants. Bright green. Strong. Plants that left that awesome tomato smell on your hands when you touched the leaves. But as soon as the plants start to flower they die. And fast. The heartbreak was just too much. So we stopped trying to grow our own tomatoes and started buying the $5 baskets at Fruit Bowl.

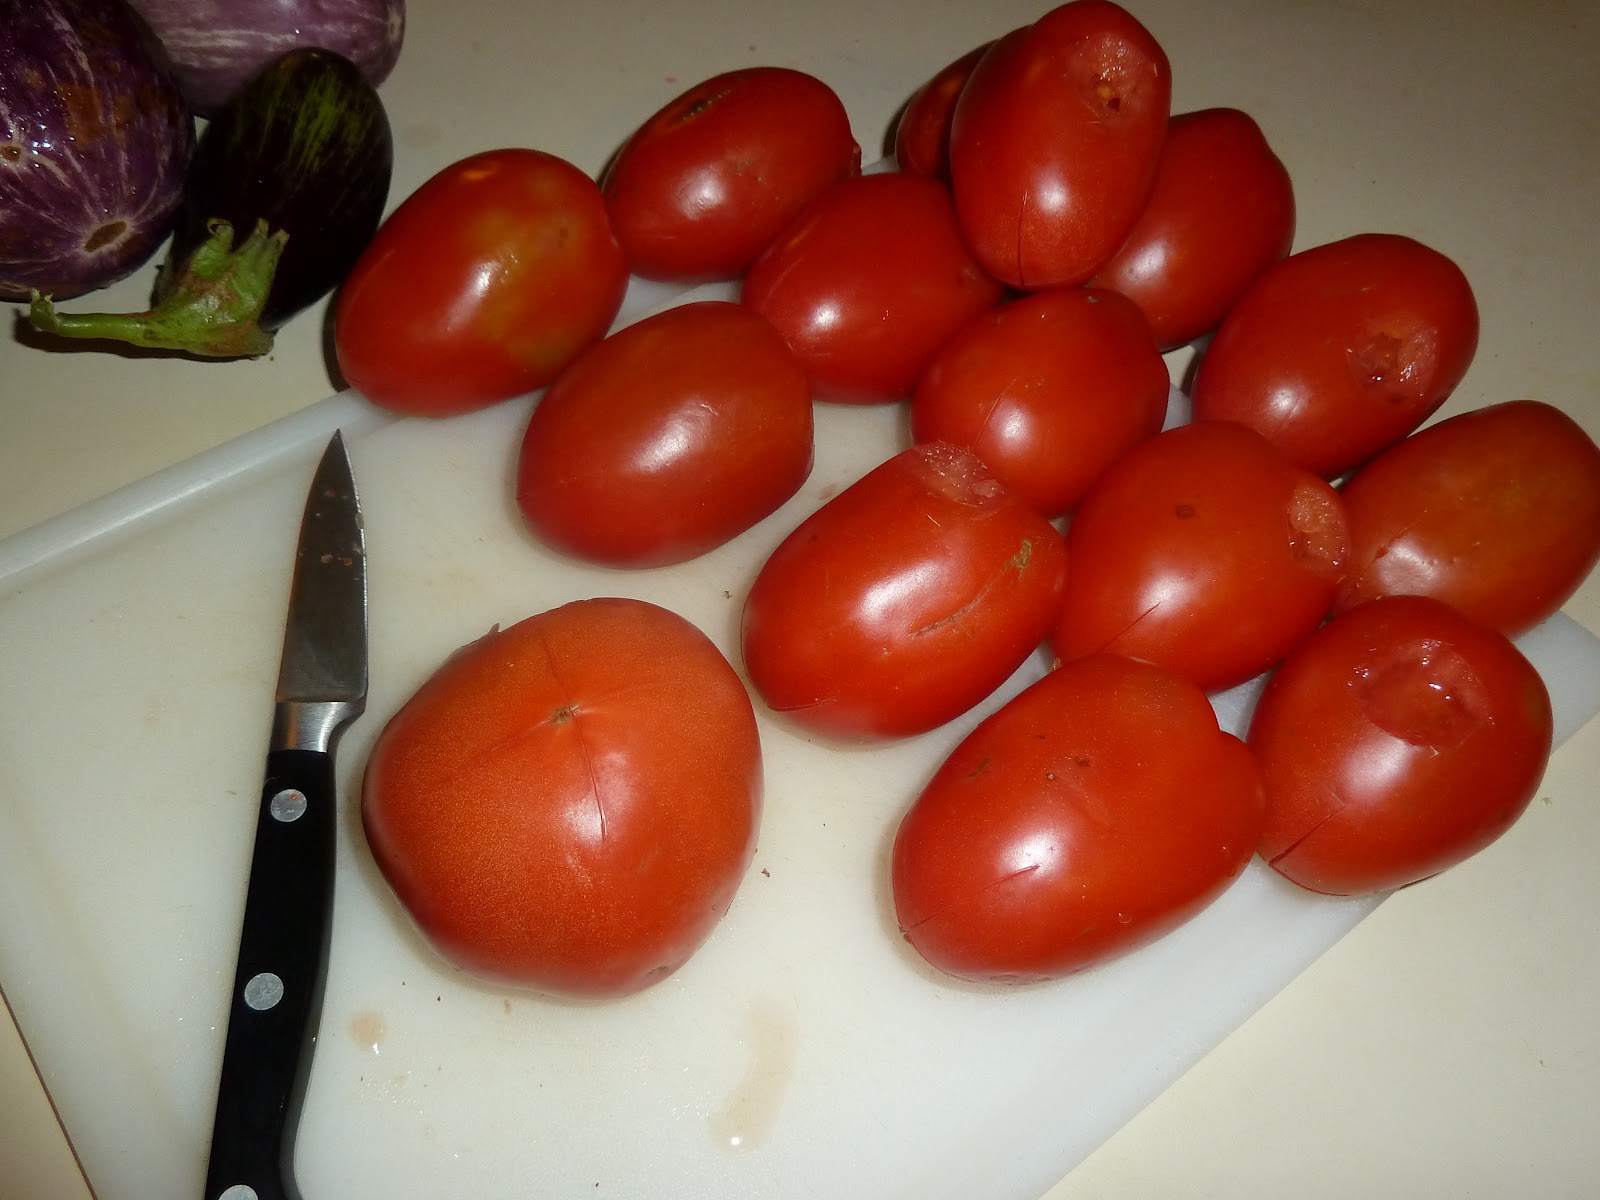
I usually do my semi-boring food prep like this on Sundays. Also, Roma tomatoes are best because there is more meat in them and less juice. At least that's my opinion. So start out by coring them (cut out the tomato belly button) and any bruised or weird parts (as the $5 basket tomatoes are sure to have).   


Then you're going to slice a not-too-deep X in the skin on the bottom of the tomato.


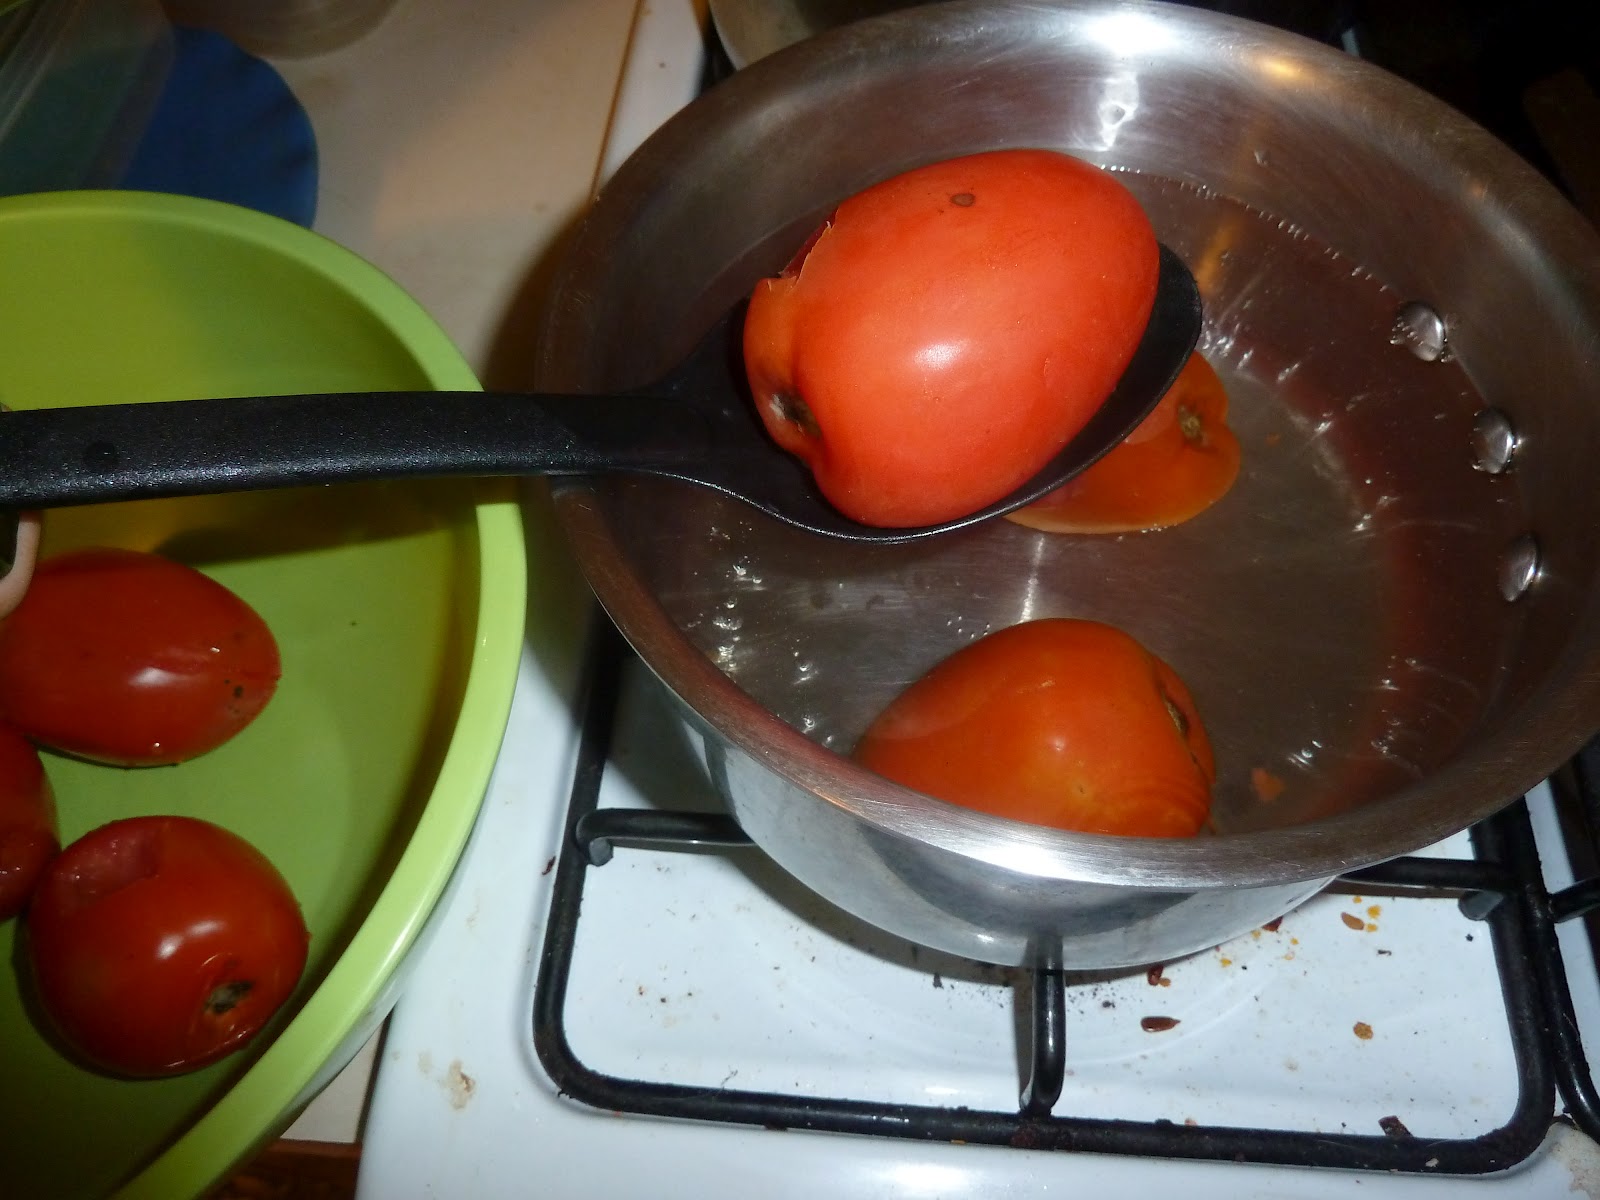
Get a pot of water boiling. Drop a few tomatoes at a time into the boiling water. And by drop, I mean lower with a spoon. Unless you would like boiling water splashed back up on your hand. Leave them in until the skin starts to blister and peel off at the X. (I think cookbooks would actually tell you to leave them in for a certain amount of time, but that never works for me. I just leave them in until they blister.) Once the skin starts to come away from the tomato, use your spoon to transfer the tomato to a bowl. Keep adding new tomatoes to the water until you're done.


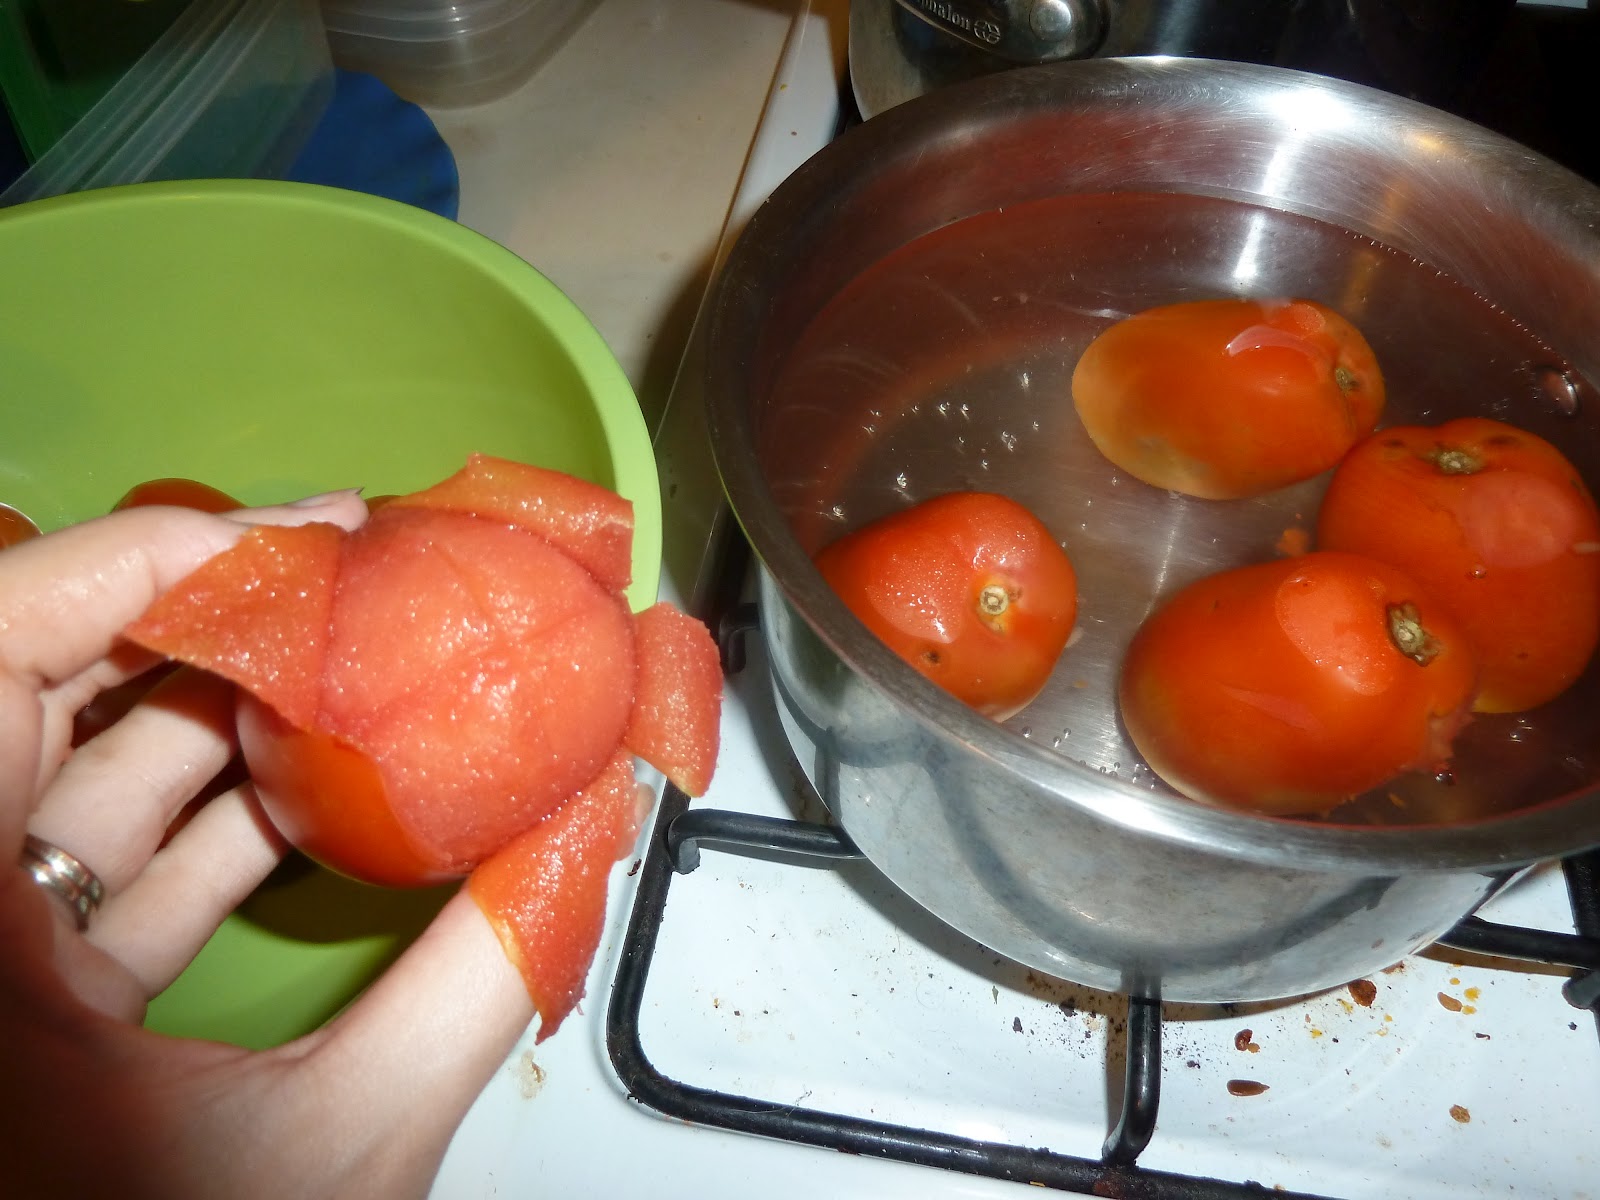
Let the tomatoes cool a bit. (Or don't, as I'm demonstrating in the picture below. But be prepared to scald your fingertips off if you do it my way.) Once they're cool enough to work with go ahead and peel the skin off the tomatoes. It should be pretty easy.


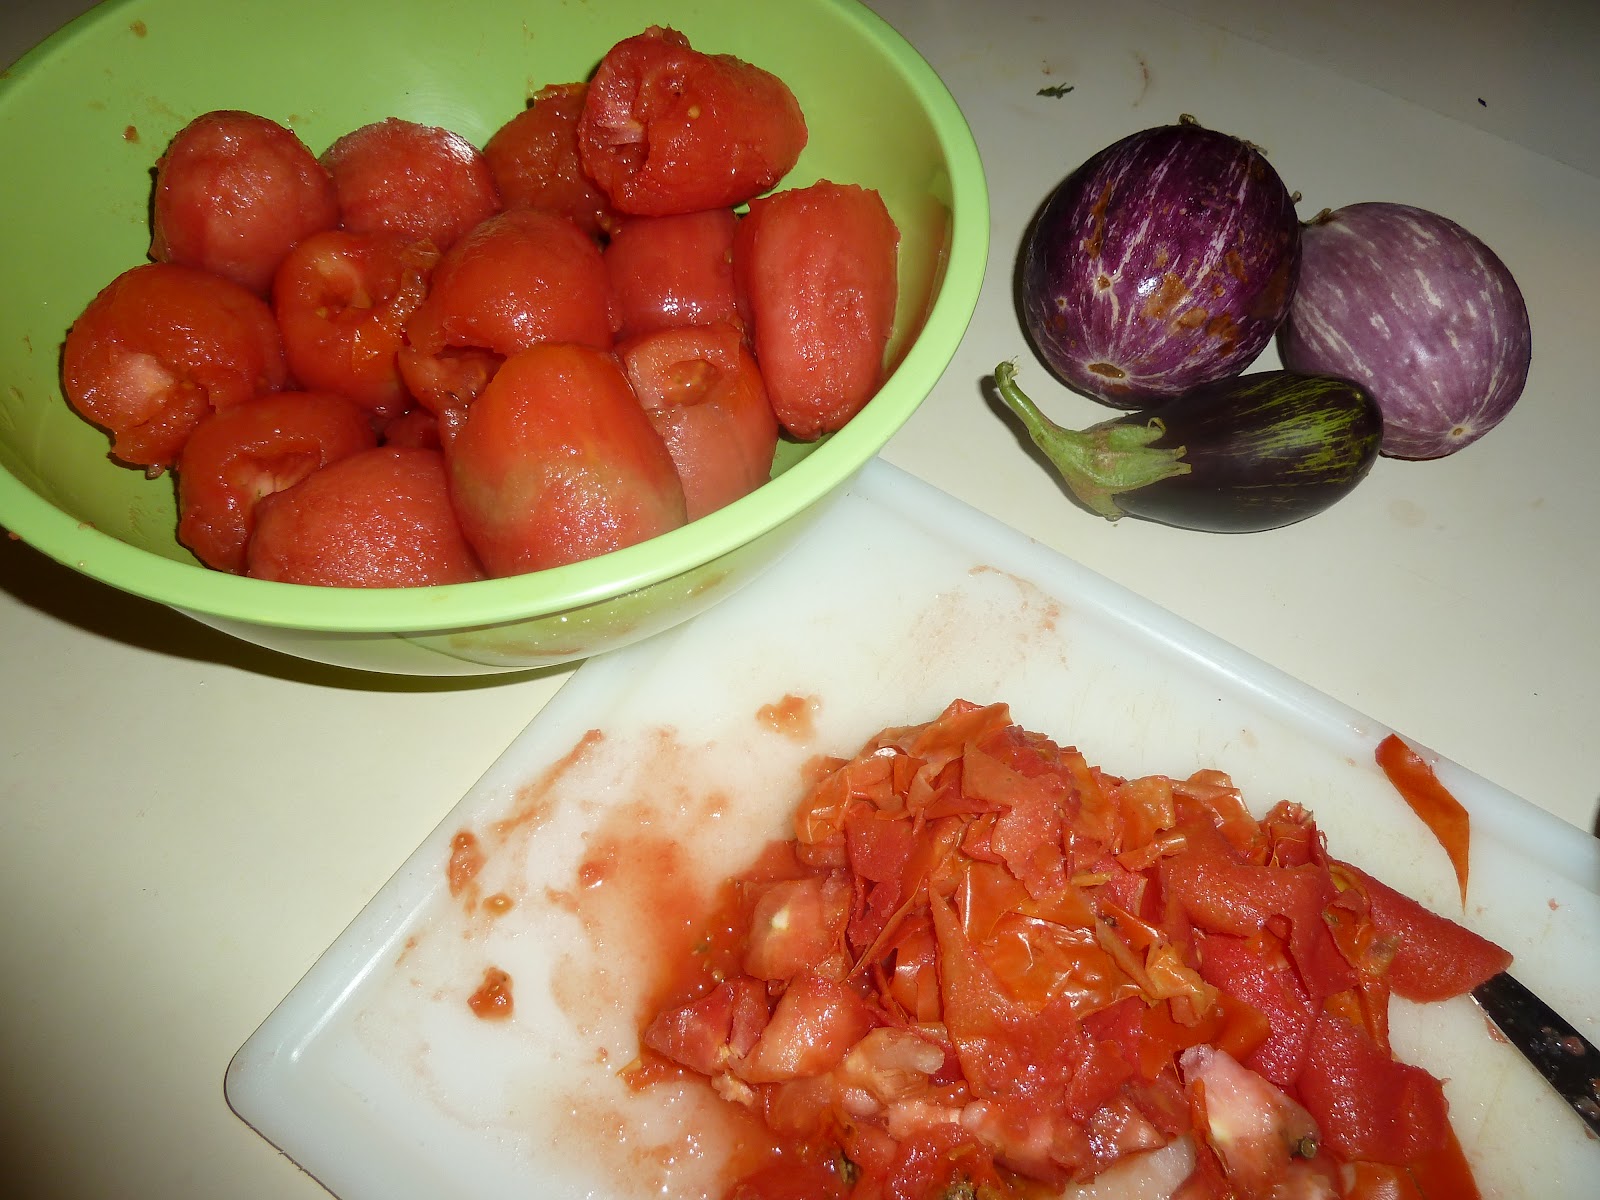
There you go. A bowl full of naked tomatoes. If you want, you can then squeeze each tomato to get rid of most of the juice and seeds that are inside. After that I usually freeze mine and use them instead of canned tomatoes. This way I avoid all the "AHHH! THERE'S BPA LEAKING INTO YOU CANNED TOMATOES GIVING YOU TERRIBLE HEALTH PROBLEMS AND GENERALLY CORRUPTING THE MORAL FIBER OF OUR CHILDREN!" insanity that is being reported these days. Then I use the tomatoes for sauce, ketchup, whatever as the need arises. I can usually complete the whole process during one Law and Order rerun. Avoiding BPA health risks and learning to never ever trust my rich college friend when she offers to take over managing my escort service (you will die. guaranteed. law and order has proven it as fact.) makes for a pretty productive Sunday afternoon in my book.


With some of your peeled tomatoes you could jump right into making ketchup to replace the Heinz in your fridge door. I used the recipe here. (Hint: that was a link.) It doesn't taste exactly like Heinz. But it does taste like tomatoes and is good on burgers. Seriously, last weekend I had a grass-fed beef burger on a homemade bun with homemade ketchup and homemade mustard. There are no words. No words.

Or you could skip all of this tomato nonsense and just watch Law and Order. Am I the only one that goes through tons and tons of tomatoes? Or am I just the only one that would go to all this trouble to avoid canned tomatoes?

Thursday, 28 June 2012

Magno Chutney and MTV

Lots of mango chutney was supposed to be happening in our kitchen last night.


But it didn't because we realized too late that we were missing raisins. The premier of Real World St. Thomas did happen though. A friend was one of the night camera men. During filming a few months ago I asked him if he was the unseen camera guy that had to get the obligatory footage of late night messy drunken hook-ups at the Real World house. Yes he was. Fabulous.

Tuesday, 26 June 2012

Why I Don't Eat What I Don't Eat - Part 1

(I want to note that I'm not a nutritionist or an expert of any sort. My dietary choices have come about through lots of reading, research, and talking to friends and family who are nutritionists and experts. If you're thinking of making any dietary changes, I'd encourage you to do the same for yourself. My hope is this post might prompt you to start doing your own research but please don't make any changes based solely on my opinions.) 

Spoiler Alert: I'm not vegan. I'm not even a vegetarian. I know some of you that know me are currently confused. Maybe it's sending you into a downward tailspin where you're wondering what else you've been lied to about. Are you, in fact, adopted? Is this real life or some dreamed up cerebral reality like The Matrix? Is Santa even real? I can't really answer any of those other questions for you. But I can explain why you might think I'm vegan.

When people invite us over for dinner I always remind them that I'm vegan, which is actually not true at all. I wear leather shoes. I love leather shoes. I love wearing leather shoes. My animal-friendly choices pertain only to my eating habits. So technically I'm someone that eats a plant-based diet. And I like local honey. So not even close to a vegan. But that's confusing to most people. So I say vegan. Then Seth will chime in with, "Well, you eat meat." And here we go. So now I have to explain to our unsuspecting well-meaning potential host that, yes, I do in fact eat meat. I eat wild-caught fish (not farmed). I eat organic grass-fed, hormone free beef (not grain-fed). I eat organic-fed free range chickens and local free range eggs. I eat organic grain and grass fed, hormone free, nitrate free pork. Are you getting the picture? That's a really long and unnecessary response to, "Would you guys like to come over for dinner Friday night." It's really easier to just say vegan. Let them feed a me a dairy-free salad. I will eat it and I will like it.

Seth bringing home the bacon...errr...wild-caught mahi!

And while the truth is that I eat appropriately fed, hormone and antibiotic free meats, I don't really. Not often. Because they're frickin' expensive. And hard to find on this island. (Although Gourmet Gallery has been upping its game lately folks. Me-approved turkey sausage and turkey breast has arrived in a freezer case near you!) So I've had to decided if I'd rather eat more meat of a quality I don't approve of or less meat overall. You can judge by the previous paragraph which direction I've taken.

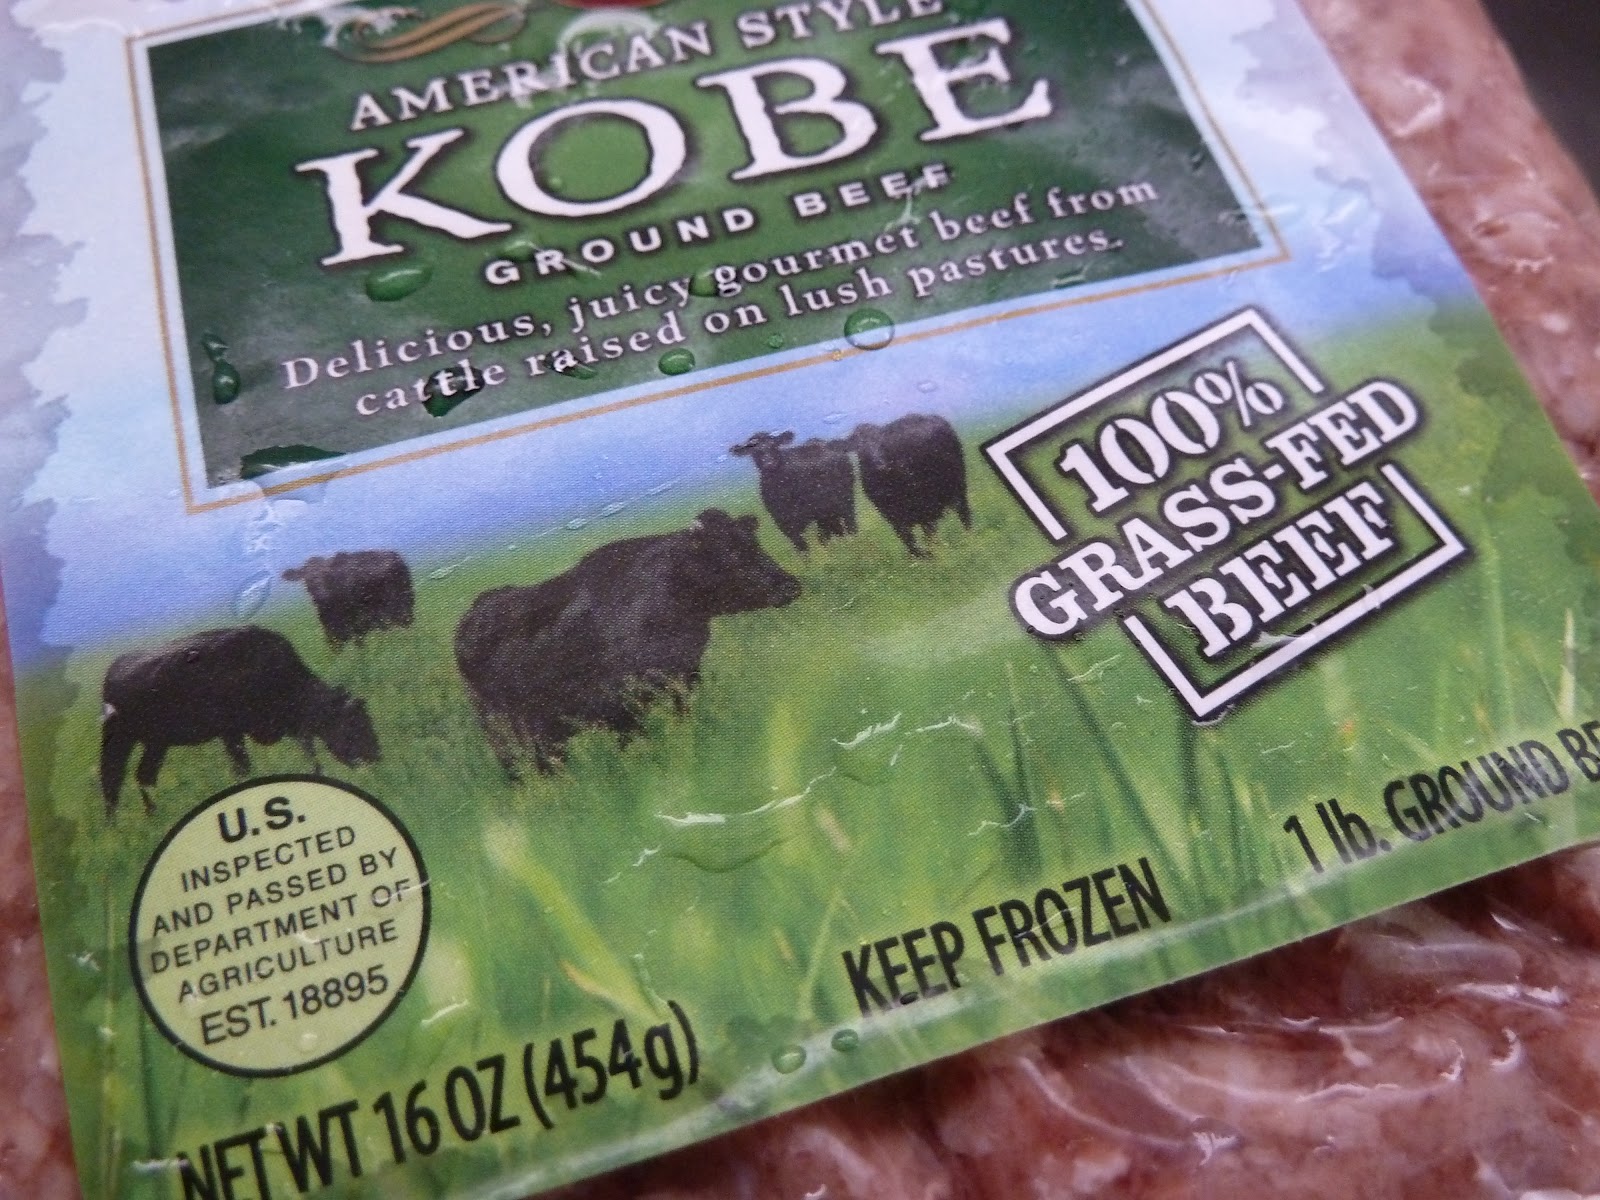
That's $10.95/lb. ladies and gentleman! We make it last a few meals.

I'd like to say my choices were made because I couldn't allow myself to eat that big juicy adorable hamburger, I mean cow, but that's not the case. True, if I was ever left in the wild to fend for myself with only fruit trees and a cow I probably wouldn't ever slaughter Old Bessie myself. I can admit it. I also have no desire to perform surgery on someone's clavicle but I certainly didn't have any problem allowing someone to perform surgery on mine. Twice. So I don't mind that someone else is humanely slaughtering my hamburger for me. I do have a problem with the terrible feed lots that livestock grow up on. I'm glad my choices mean I'm not contributing to them. But my drive is fueled mainly by what's in the meat, not how cute it is when it's alive.

He's cute, but I'd eat him. As long as he was raised on a GMO-free diet.

My goal is to avoid GMOs (genetically modified organisms). Seriously, research them. They're no good. Livestock that grew up on feedlots ate them. When I eat the little bits and pieces of that livestock, I eat the GMOs too. Because foods with GMOs aren't labeled I don't know if I'll ever be able to avoid all of them. My meat choices are just one big step toward avoiding a lot of them.

But the good guys are out there too, the farmers that refuse to raise cattle (and pigs and chickens) that way. They have to charge more for their meat because if they're not feeding the animals cheap GMO grains, the feed costs more. It costs more to have pasture with organic grasses for the cows to live and graze on. Those farmers also don't get the government incentives that come with feeding the cows genetically modified corn and soy. But cows aren't supposed to eat corn and soy. They're supposed to eat alfalfa and clover and good green grasses. So I support those good guy farmers with my dollars. Even if it's just a few dollars. I buy the amount of meat my budget affords and that is the amount of beef/chicken/pork/bison/fish/turkey that I eat.

And you thought this only happened in insurance commercials. Wrong. It also happens in Virginia.

And I eat a lot of beans and a lot of grains. Yellow split peas have insane amounts of protein. So do lentils. Both cook up in less than 30 minutes. Brown rice is good, but so is jasmine rice boiled with cumin. We always have quinoa and bulgar around. There are always frozen black beans in the freezer. Garbanzo beans too. Eating without meat means you have to be either very creative or very boring. I've learned to use a lot more spices and flavor combos. I've learned to properly cook dried beans (it's a combo of overnight soaking and boiling the next day, plus a bay leaf). Right now I'm reading about the benefits of soaking grains as well, but I'm not quite ready to go there. Maybe in a few weeks...or years.

I didn't get here overnight. It was a process. It's still a process. I knew where I wanted to end up, only eating organic properly-fed meats, and I started taking steps in that direction. Eventually I'll get around to writing part two of this manifesto. Why I don't eat dairy. But for now this is all my brain can put into not quite grammatically correct sentences.  I hope it's helpful. Especially for those of you who are planning to invite me to dinner sometime soon.

Thursday, 14 June 2012

How to Make Your Own Almond Butter

So once upon a time (maybe like two years ago?) I went over to friends house and watched her throw some almonds into her food processor. I asked her what she was making and she said almond butter. Who the? What the? You can MAKE almond butter? Oh yes, she says, and peanut butter. Not only that, she started it up and then left to take a shower. Setting aside for the moment that for some reason I was hanging out in a friend's kitchen while she had better things to do, like go and take a shower, this almond butter needed virtually no work. So after I got the hint that she had places to be which did not involve me loitering at her kitchen table, I zipped home up the mountain to make my own delicious jar of almond butter. I threw the almonds in my food processor, hit the button, and stood back proudly watching while my almonds miraculously morphed into butter my food processor started making terrible noises. Like a combo of nails on a chalkboard and dying puppies. Then there was smoke. And then there was silence. Terrible silence.

Soooo, apparently using a not so great food processor doesn't work for almond butter. I had one of those convenient looking blender/food processor combos. Yes. Had. The almonds killed it. But never fear. A mere 250 Discover points later and another big new fancy-schmancy 12 cup food processor was on its way. (I buy groceries with my card and they give me points for food processors and Gap gift cards. Me and Discover, we've got a good thing going.) Of course, it wasn't on its way to St. Thomas. Because 90% of the universe doesn't ship to St. Thomas. (Because they're jealous.) It was on its way to friend's dad's house in south Florida. When she went up to see her family the next month, it was there. Actually there were two of them there. Silly Amazon. But we didn't realize this. We all thought one of them was the processor and one was accessories. For 250 Discover points you should get two boxes, right? So imagine our surprise when we picked up two very large boxes from the post office, each containing a new food processor and accessories. Seth spent the next four (FOUR!) months trying to explain to the nice not-very-good-at-English call center guys why we needed a free label to mail them back a rather heavy food processor from an island they don't even ship to, and no we don't need a refund thankyouverymuch. (Four months!) At one point we were in possession of two $300 food processors and a full refund onto our credit card for another. Good thing we're honest, Amazon. Good thing.  

And so, with my one new food processor, I got to try my hand at almond butter again.  It was just as easy as I remembered. Want to give it a whirl? Have a heavy duty food processor up to the challenge? Start out by toasting up about four cups of almonds. Or buy them pre-toasted if you're fancy like that. My kitchen isn't very scientific. I put them in a 350ish degree oven for ten minutes or so, tasting them occasionally. Usually burning my fingertips and tongue in the process because I'm one of the world's most impatient people. The more you toast them, the toastier your almond butter will taste. I suppose you could also make almond butter with raw almonds if you prefer.


Now toss your toasted almonds into your food processor. It's okay if they're still hot. Fasten the lid and turn it on. And that's it. You don't even have to scrape down the sides with a spatula during the process. Just walk away. But for you guys I didn't just walk away. I took pictures at one minute intervals to give an idea of what you should be looking at.


See, here after one minute it gets kind of crumbly. It's more of an almond meal.


Kind of the same after two minutes.


It starts trying to form into a cohesive almond meal ball after three minutes.


After four minutes a mutant almond swamp monster emerges. Whatever you do, do not open the lid at minute four. You do not want to release that swamp monster into your home. He's kind of like Chucky with the aroma of toasted almonds.


After five minutes you have vanquished the almond swamp monster. Good job. You can put down the baseball bat and let your kids safely out of their bedroom closets.


You're going to start thinking you're done after six minutes. And maybe you are. But you're probably not. Taste it and see. Your processor might be different from mine. You'll also want to add a bit of salt and bit of sugar or honey at this point.


My almond butter is traditionally done after seven minutes. It's smooth and creamy. The longer you process it the more liquid-y it will get. Add a little more salt or sugar if you need to. Just give it a few little zzt-zzts with the pulse button to mix it in.


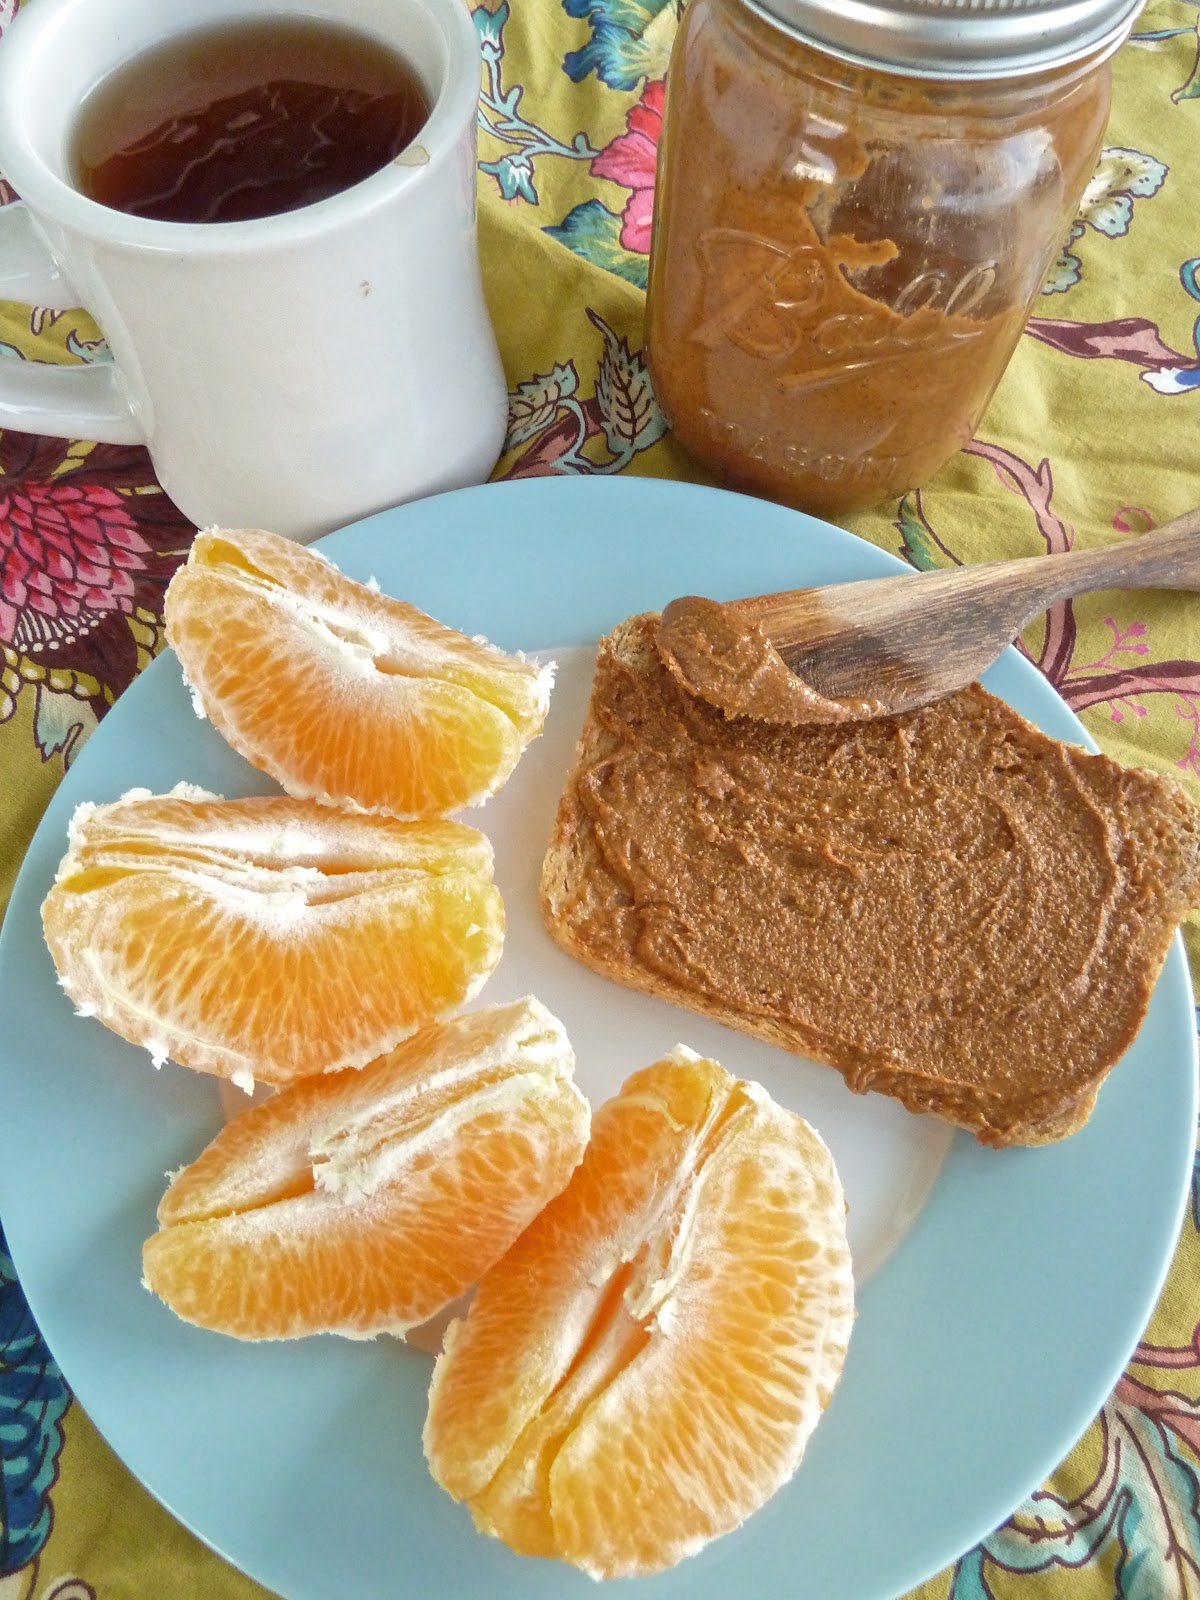
And that's that. Fresh almond butter minus any preservatives. I keep mine in a cabinet at room temperature, like peanut butter. And speaking of peanut butter, make it the exact same way. My peanut butter usually takes a minute or two less than my almond butter. 


Homemade Almond Butter
- This makes about 2 cups of almond butter. 
- Important: I have a 12 cup Kitchenaid and my friend uses a 10 cup Cuisinart. Don't use your little 4 cup anything. I'm pretty sure it won't be up to the challenge (meaning: the almonds will kill it). This is better suited for the motor in heavy duty food processors.  

4 c. almonds
salt
sugar or honey (or sweetener of your choice)

 Heat your oven to 350F. Spread out the almonds on a sheet pan and toast them in the oven for about 10 minutes. Keep checking to make sure you don't burn them. The toastier your almonds, the toastier your almond butter will be. Once the almonds are toasted, transfer them to your food processor  and process them for about 7 minutes. After about 6 minutes, add the salt and sugar. I usually start with about a 1/2 tsp of each and work up from there. It's really subjective and up to your taste. Process until it's smooth and creamy, the consistency of peanut butter!