Showing posts with label How To Do Stuff. Show all posts

Tuesday, 29 January 2013

Kitchen Curtain Re-Do

close up


A few weeks ago I spent half a Saturday making some DIY roman shades for the kitchen. Our originally thrown up curtains (still in existence an embarrassing three years later) were from Kmart. You know how the island is. Sometimes you just have to take what you can get. They were awful. They blended into the wall, were always dirty from rubbing up against the screen, had an amazing ability to knock over that utensil holder whenever a strong gust of wind blew in, and I'm pretty sure were going to eventually burn the house down. The right side refused to stay in the bracket. Seth eventually "fixed" it using an old ponytail holder. I know I'm not the only one to let stuff like that go on far too long but it's still embarrassing.

before

I've made Jenny Komenda's DIY roman shade three times now (she is a DIY genius!). While somewhat time consuming, they're very simple. 

You start with simple venetian blinds. On St Thomas you can get them in the $5-10 range at Home Depot.

blinds

With scissors you carefully remove most of the plastic slats.

string

Add the fabric and use fabric glue to create a side hem and attach it to the remaining slats. I get all my project fabric at that little fabric and craft store down near Lionel Roberts Stadium. Do you know the one? It's on that one-way road with the bright green house with red railings on the corner (across from Jarvis School annex and the Rasta that sits there and knits all day). They have a little parking lot which is part a large part of why I love it.

fabric

While you've been doing this, hopefully you found someone handy and helpful lounging around your household willing to put up the hanging hardware during halftime. If not, do that yourself now.

hanging hardware

And viola! (Well, let the glue dry a bit and then voila.)

after

I don't know what it is but I cannot get a decently lit picture in my kitchen at any time of the day. Don't know what to do to remedy that. You get the idea though. They look far better than that mess that preceded them. And I was able to make three of them (there's one more window) for around $35 dollars.

If you're interested in making these for yourself here are the full instructions on Little Green Notebook.

Friday, 11 January 2013

My Love Affair With Spray Paint

It's bad, you guys. Somewhere along the line I learned that Rustoleum fixes everything. Ugly picture frames. Rusty mason jar lids. Hand-me-down patio furniture. Relationships. When my world is crumbling and caving in, Rustoleum is usually in the top three of things I turn to. You think I'm kidding? But oh no, joking I am not. Recently I've been having living room melt downs about the state of our coffee table. (I just cleaned it! How is it covered in crap already? What's wrong me me that I can't even keep my coffee table cleared off? How can I combat life's problems with a cluttered coffee table? It's too distracting!) Seth will hold me and let me cry for about 15 seconds, which is about all I need. Then I go on with my life.

Last month while visiting Boston we swung by IKEA. (Ok, no one swings by IKEA. We were there for a few hours and had lunch and tiny princess cakes.) In the deadly "put it all in your bag because it's only five dollars" section, I tried to convince Seth that we needed a tray to corral all the ridiculousness that ends up on our coffee table. His answer was that he'd never heard me mention wanting a tray before and too much princess cake combined with hour three of IKEA overwhelming-ness had me convinced I needed everything. But he told me if I really wanted a tray I could use the surfboard tray he picked out during wedding gift returns. The one that has now been sitting unused in a closet for seven years. (We don't surf. And even if we did I don't think we'd need to tell our friends about our new hobby via a surfboard tray. My guess is we could just tell them using our words.) Only if I can paint it and removed the surfboards, I said. And we reached an agreement.

tray - before

So last weekend I drug the dusty surfboard out of it's seven year exile. I'm not even positive I'm going to keep it white. I was just so excited to organized the coffee table that I went with what I had.

painting

And I love it. As you can see, another living room staple got an update too. Spray paint is like an addiction. Once you start spraying stuff you see all the other items that need updating. Plus it's a a pain to pull out our drop cloth so I try to get it all done at once. The only thing that kept me from painting our paper towel holder and tape dispenser was the rain that moved in. And the key to not having something look spray painted is cleaning it well before painting (no dust) and to spray several thin layers, allowing drying time in between. Don't try to get it all covered on the first or second go round because then you get drips.

tray - after

And the tray is doing a great job, pullings it's weight as a member of this family by containing the coasters, candles, books, and electronics that usually get tossed haphazardly all over the table. Seth wondered aloud if the people who gave that chip and dip bowl to my parents as a wedding gift back in the 70s ever imagined it might be used as a cell phone and tiny digital musical device holder. Probably not. Unless they watched a lot of sci-fi movies.

Now, go forth and spray paint. The weekend awaits you. You'll be surprised how exhilarating it is. Nothing says empowerment like deciding the generic box store paper towel holder should be red, and making it so.

Friday, 14 December 2012

Spiced Rum

I always try to make something yummy for good friends around Christmas. A few years ago it was peppermint marshmallows. Last year it was cinnamon buns. This year Seth and I tried our hand at homemade spiced rum. It was a grand experiment. We figured if we're living in a place where we can buy a handle of yummy local St Croix rum for less that $11, why would we not? How did it take us so long to come up with this idea?

We did it together on one of our Thursday date nights. Our hope is to keep tweaking the recipe and make a secret Rogati spiced rum. You know, the kind where friends and family are all "I hope I get a bottle of the special Rogati rum this December. I look forward to it all year long!" But for this first year we stuck with the Serious Eats recommendations: vanilla bean, orange zest, ginger, cloves, cinnamon, star anise, allspice, nutmeg and pepper. Almost all stuff we already had at home. Seemed like a safe way to get started.


I was actually kind of bummed to empty the bottle into individual gift bottles when it was done steeping. So pretty.


Sunday, 23 September 2012

Pizza, I Love You.

When I tell people I gave up eating diary the usual response is, "I could never give up cheese!" (Do you know why? It's because it's addictive. I mean actually scientifically addictive.) And I'll admit, the cheese is difficult to pass up sometimes. I've found after forming new habits I don't miss milk or yogurt or even sliced cheese on my sandwiches. What I do hate is saying no to delicious smelly moldy imported cheeses when they're available. (Like at island private school wine tasting fundraisers at the Ritz. You'll probably see me eating cheese there in a few months. Feel free to judge me.) The other difficult food to pass up is pizza. Pizza is hands down what I miss the most. What is it about pizza?

Seth was kind enough to win me Kitchenaid mixer a few years ago. I had been asking for one and he was a little baffled as to why we needed a $400 mixer. (And I didn't really have a good answer either so the matter died.) But then he went and won one kind of accidentally in a Price is Right spoof at a work conference. So I'm sort of a lazy bread maker. I throw things in and let the dough hook do the kneading. This pizza dough is pretty sticky, as demonstrated by my attempted to put the ball into a bowl to rise. But really, that mixer bowl to rising bowl transfer is all the hands-on time required when I use the Kitchenaid.


I had half a block of tofu in the fridge waiting to be used, so I mixed up a cheese-like sauce in the food processor. The tofu, lemon juice, nutritional yeast, and garlic blends into something tangy and creamy. Roasted red peppers might have made a good addition too. I'm not saying it tasted like cheese. Just that it was tasty.


In the disgusting Caribbean heat of my open-air kitchen, it only takes about an hour for pizza dough to rise.


I formed the crust directly on my dough paddle. It was much less sticky after rising. Magic scientific things go during that hour of rising I guess. No need to get a rolling pin dirty. I just used my fingers to slowly stretch it out. The trick to not having it stick to the paddle is the cover the paddle with corn meal. When I've stretch it into a  mostly round circle, I stab (pierce?) it with a fork to keep it from bubbling while it bakes.


I covered it in my tofu spread, spinach, sliced red onion, jarred artichoke hearts, and walnuts. (Seth says that doesn't count as pizza. I say it counts as delicious.) I spritzed the spinach and onions with olive oil once they were spread out. Then sprinkled on some crunchy sea salt. With sort of a jerking motion, I transferred the pizza from the paddle to the hot pizza stone. Of course I did a kind of terrible job. Half stuck to the paddle. The other half to the pizza stone. With 500 degrees of oven heat blasting into my face I panicked and yelled for Seth. He helped me transfer it completely to the stone and we slammed the over door shut to stop the blistering heat. Then I cried just the tiniest bit because my pizza got all squished up. Seth hugged me and asked me if I realized it was still the same volume amount of pizza squished up as it would be stretched out flat. About 12ish minutes later I get this:


Yum. So good. Other than the crust being extra thick and squishy because of the transfer debacle. I made Seth a tomato-y cheese based version (minus the artichokes and walnuts) so that he wasn't jealous of my pizza.


Pizza Crust - Three 12" Pizzas
(Adapted from a Cook's Illustrated pizza recipe, which doesn't quite work here. Maybe due to climate? Maybe due to altitude? Maybe because I'm bad at this?)

4 1/2 c. all purpose flour
1 1/2 tsp salt
1 3/4 c. hot tap water
2 1/2 tsp. yeast
2 Tbsp olive oil

You want your water to be warm but not hot (or it kills the yeast). Sprinkle the yeast into the water and let it sit for about 5 minutes. The yeast should sort of dissolve and turn bubbly. Mix your flour and salt together in the mixing bowl. After 5 minutes, add the yeast/water mixture and the olive oil slowly and mix together. It turns into a really gooey ball of dough. At the point I let the dough hook do the kneading for about 5 minutes. If you need it by hand, good luck. (If you need by hand, maybe use less flour from the start and add it in gradually as you knead it? You're going to need a lot of flour on your hands and the counter. Your hands are going to be on sticky mess so don't panic. This is a much stickier dough than any other I make.) When you're done kneading, transfer the dough into a large bowl sprayed with non-stick spray. Let it rise for 1 hour if you live on St Thomas and don't have air conditioning. Maybe 1 1/2-2 hours if you live anyplace normal.

After the dough has risen (doubled in size, yada, yada) cover a dough paddle or a cookie sheet with no edges in a thick layer of corn meal. Take one third of the dough and slowly stretch it out on the paddle with your fingers. Use a fork to poke holes in it. Cover it with the sauce and toppings of your choice and bake it in an oven that's preheated to as high as it will go. Typically 450 to 500 degrees F. (If you use a pizza stone, use a quick jerking motion to transfer it from the paddle to the stone. Try not to cry like I did if you mess this up. Crying about pizza doesn't fix it. It just makes you look weak and hormonal.) Check on it in about 12 minutes to see if the crust is a golden brown. If not, leave it in a few more minutes. If it is, use a spatula to help transfer the pizza back from the stone to the paddle.

I cook my pizzas one at a time so there's about 30-40 minutes of high action pizza time going on at the end. If you're on St. Thomas, be prepared to sweat. Have a cold drink handy and be sure to appreciate that any room in your house is now a good 10-15 degrees cooler than your kitchen.


Wednesday, 1 August 2012

How to Peel Tomatoes and Make Ketchup

Why would you care about peeling tomatoes, you ask? Because that's the first step to making your own ketchup! Unless you would rather just buy whole canned tomatoes. But that is far too easy for me. I'd totally grow my own tomatoes but it seems physically impossible to do on St Thomas. In the Bahamas my friend Penny could grow 20-30 tomatoes plants at once. During the winter. It was incredible. But not here. Not St. Thomas. This island gods hate tomatoes and want to stop them at all cost. Someone once told us that you used to be able to grow tons of tomatoes year round. Then a hurricane blew in some sort of fungus that kills them all off before they can finish ripening. Sounds crazy, yes? A hurricane blew in a fungus? But I believe it. You start believing the crazy once you've lived here long enough. And over the last six years we have grown a large number of beautiful tomato plants. Bright green. Strong. Plants that left that awesome tomato smell on your hands when you touched the leaves. But as soon as the plants start to flower they die. And fast. The heartbreak was just too much. So we stopped trying to grow our own tomatoes and started buying the $5 baskets at Fruit Bowl.

I usually do my semi-boring food prep like this on Sundays. Also, Roma tomatoes are best because there is more meat in them and less juice. At least that's my opinion. So start out by coring them (cut out the tomato belly button) and any bruised or weird parts (as the $5 basket tomatoes are sure to have).   


Then you're going to slice a not-too-deep X in the skin on the bottom of the tomato.


Get a pot of water boiling. Drop a few tomatoes at a time into the boiling water. And by drop, I mean lower with a spoon. Unless you would like boiling water splashed back up on your hand. Leave them in until the skin starts to blister and peel off at the X. (I think cookbooks would actually tell you to leave them in for a certain amount of time, but that never works for me. I just leave them in until they blister.) Once the skin starts to come away from the tomato, use your spoon to transfer the tomato to a bowl. Keep adding new tomatoes to the water until you're done.


Let the tomatoes cool a bit. (Or don't, as I'm demonstrating in the picture below. But be prepared to scald your fingertips off if you do it my way.) Once they're cool enough to work with go ahead and peel the skin off the tomatoes. It should be pretty easy.


There you go. A bowl full of naked tomatoes. If you want, you can then squeeze each tomato to get rid of most of the juice and seeds that are inside. After that I usually freeze mine and use them instead of canned tomatoes. This way I avoid all the "AHHH! THERE'S BPA LEAKING INTO YOU CANNED TOMATOES GIVING YOU TERRIBLE HEALTH PROBLEMS AND GENERALLY CORRUPTING THE MORAL FIBER OF OUR CHILDREN!" insanity that is being reported these days. Then I use the tomatoes for sauce, ketchup, whatever as the need arises. I can usually complete the whole process during one Law and Order rerun. Avoiding BPA health risks and learning to never ever trust my rich college friend when she offers to take over managing my escort service (you will die. guaranteed. law and order has proven it as fact.) makes for a pretty productive Sunday afternoon in my book.


With some of your peeled tomatoes you could jump right into making ketchup to replace the Heinz in your fridge door. I used the recipe here. (Hint: that was a link.) It doesn't taste exactly like Heinz. But it does taste like tomatoes and is good on burgers. Seriously, last weekend I had a grass-fed beef burger on a homemade bun with homemade ketchup and homemade mustard. There are no words. No words.

Or you could skip all of this tomato nonsense and just watch Law and Order. Am I the only one that goes through tons and tons of tomatoes? Or am I just the only one that would go to all this trouble to avoid canned tomatoes?

Thursday, 14 June 2012

How to Make Your Own Almond Butter

So once upon a time (maybe like two years ago?) I went over to friends house and watched her throw some almonds into her food processor. I asked her what she was making and she said almond butter. Who the? What the? You can MAKE almond butter? Oh yes, she says, and peanut butter. Not only that, she started it up and then left to take a shower. Setting aside for the moment that for some reason I was hanging out in a friend's kitchen while she had better things to do, like go and take a shower, this almond butter needed virtually no work. So after I got the hint that she had places to be which did not involve me loitering at her kitchen table, I zipped home up the mountain to make my own delicious jar of almond butter. I threw the almonds in my food processor, hit the button, and stood back proudly watching while my almonds miraculously morphed into butter my food processor started making terrible noises. Like a combo of nails on a chalkboard and dying puppies. Then there was smoke. And then there was silence. Terrible silence.

Soooo, apparently using a not so great food processor doesn't work for almond butter. I had one of those convenient looking blender/food processor combos. Yes. Had. The almonds killed it. But never fear. A mere 250 Discover points later and another big new fancy-schmancy 12 cup food processor was on its way. (I buy groceries with my card and they give me points for food processors and Gap gift cards. Me and Discover, we've got a good thing going.) Of course, it wasn't on its way to St. Thomas. Because 90% of the universe doesn't ship to St. Thomas. (Because they're jealous.) It was on its way to friend's dad's house in south Florida. When she went up to see her family the next month, it was there. Actually there were two of them there. Silly Amazon. But we didn't realize this. We all thought one of them was the processor and one was accessories. For 250 Discover points you should get two boxes, right? So imagine our surprise when we picked up two very large boxes from the post office, each containing a new food processor and accessories. Seth spent the next four (FOUR!) months trying to explain to the nice not-very-good-at-English call center guys why we needed a free label to mail them back a rather heavy food processor from an island they don't even ship to, and no we don't need a refund thankyouverymuch. (Four months!) At one point we were in possession of two $300 food processors and a full refund onto our credit card for another. Good thing we're honest, Amazon. Good thing.  

And so, with my one new food processor, I got to try my hand at almond butter again.  It was just as easy as I remembered. Want to give it a whirl? Have a heavy duty food processor up to the challenge? Start out by toasting up about four cups of almonds. Or buy them pre-toasted if you're fancy like that. My kitchen isn't very scientific. I put them in a 350ish degree oven for ten minutes or so, tasting them occasionally. Usually burning my fingertips and tongue in the process because I'm one of the world's most impatient people. The more you toast them, the toastier your almond butter will taste. I suppose you could also make almond butter with raw almonds if you prefer.
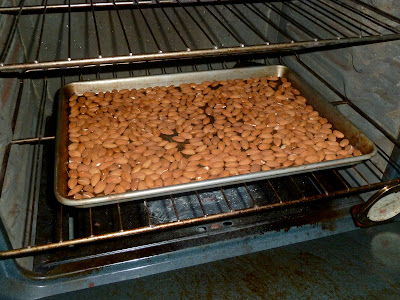


Now toss your toasted almonds into your food processor. It's okay if they're still hot. Fasten the lid and turn it on. And that's it. You don't even have to scrape down the sides with a spatula during the process. Just walk away. But for you guys I didn't just walk away. I took pictures at one minute intervals to give an idea of what you should be looking at.


See, here after one minute it gets kind of crumbly. It's more of an almond meal.


Kind of the same after two minutes.


It starts trying to form into a cohesive almond meal ball after three minutes.


After four minutes a mutant almond swamp monster emerges. Whatever you do, do not open the lid at minute four. You do not want to release that swamp monster into your home. He's kind of like Chucky with the aroma of toasted almonds.


After five minutes you have vanquished the almond swamp monster. Good job. You can put down the baseball bat and let your kids safely out of their bedroom closets.


You're going to start thinking you're done after six minutes. And maybe you are. But you're probably not. Taste it and see. Your processor might be different from mine. You'll also want to add a bit of salt and bit of sugar or honey at this point.


My almond butter is traditionally done after seven minutes. It's smooth and creamy. The longer you process it the more liquid-y it will get. Add a little more salt or sugar if you need to. Just give it a few little zzt-zzts with the pulse button to mix it in.


And that's that. Fresh almond butter minus any preservatives. I keep mine in a cabinet at room temperature, like peanut butter. And speaking of peanut butter, make it the exact same way. My peanut butter usually takes a minute or two less than my almond butter. 


Homemade Almond Butter
- This makes about 2 cups of almond butter. 
- Important: I have a 12 cup Kitchenaid and my friend uses a 10 cup Cuisinart. Don't use your little 4 cup anything. I'm pretty sure it won't be up to the challenge (meaning: the almonds will kill it). This is better suited for the motor in heavy duty food processors.  

4 c. almonds
salt
sugar or honey (or sweetener of your choice)

 Heat your oven to 350F. Spread out the almonds on a sheet pan and toast them in the oven for about 10 minutes. Keep checking to make sure you don't burn them. The toastier your almonds, the toastier your almond butter will be. Once the almonds are toasted, transfer them to your food processor  and process them for about 7 minutes. After about 6 minutes, add the salt and sugar. I usually start with about a 1/2 tsp of each and work up from there. It's really subjective and up to your taste. Process until it's smooth and creamy, the consistency of peanut butter! 

Tuesday, 3 April 2012

How to Work Out on an Island

I've been taking advantage of the fact that it's not as hot as the sun here yet and working out in the late afternoon or early evenings. It's April and I still don't have to worry about catching (acquiring? working up?) a heat stroke by exerting myself after 7:30am. I know that means I'm mocking the heat and it will beat me into submission and remind me who's boss later this month, but what's a girl to do? The days of waking up in bed not covered in sweat are slowly disappearing. Soon I'll want to be anywhere but in bed by 7am (yep, no kids. sleeping past 5am. awesome.) because around that time I'll wake up a sticky mess (yep, no air conditioning. uncomfortable. not awesome.). So for now I'm taking advantage of a few more cool moments of sleep in the morning and working out in the afternoons. Here's what I get to look at between crow push-ups and side lunges with arm raises. It reminds me not do die during two minutes of cardio in the plank formation.


It's awesome. The best part, really. I'm glad I was finally smart enough to move my work out sessions out of the office, with it's lovely view of the cracked wall outside by the washing machine. What I was not smart enough to do was leave my work out wear in a breezy place to dry out until laundry day.


Warning: shutting up formerly sweaty clothes in a dark warm guest room may seem like a good idea, but honestly, beware the next time you have to open the door and go in there. The smell will hit you like a wall of, ummm, formerly sweaty clothes that have been shut up in a dark warm guest room. I'm sure it makes everyone even more excited about coming down for a stay in our luxury sweat-scented suite.

In other unrelated news, I think I'm going to paint that room a mossy green...

Saturday, 31 March 2012

Do you stock stock?

I've shown you a picture of my freezer before. It's chock full of stock. (Although in that photo most of the stock is hiding out in the back.) I mainly keep vegetable stock on hand, since I mainly eat vegetables, but there are usually few quarts of chicken stock lurking in there too. Stocks get used on a weekly basis in our kitchen. They're not just for soups. You can boil grains in them (some of my favorites - brown rice, quinoa, bulgar). You can use them for sauces. When I was sick with the plague last month, I sipped on hot nutrient-dense chicken broth because that's all my throat would allow. (Do you know the difference between stock and broth? No? Check it out here.) To save money and avoid all the sodium and potential msg hidden in canned and boxed stock, I make my own. It's craaaaazy easy.

I'm sure there are many "correct" ways to make vegetable stock, but I use a loose recipe and then throw in whatever else I may have on hand. I always make sure a few carrots, some celery, onion, and garlic find their way into the pot. This time I had some past-their-prime mushrooms, potatoes, and parsley too.


Gather your ingredients and chop them up. Don't work too hard. Big, uneven chunks are okay. You don't even have to peel the onion. Just chop it into 4-6 big chunks and throw it in.


Use a big pot because you'll have a lot of vegetables. Cover them with water, throw in a bay leaf, and start them to boiling. Let them simmer for a few hours. There's no magic formula that I've found. Just take a sip every now and then to see if it has enough flavor for your liking. Remember it doesn't need to be able to stand alone with it's flavor. It's usually plays more of a supporting role. Just make sure it's not too weak.


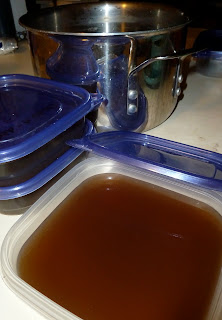
When you're done the stock should have a deep color. This one is brown because of all the mushrooms I threw in. Usually they tend to be a deep yellow. Put a strainer or colander over a large bowl and pour the stock through, separating all the solids. Once you've pour out all the liquid, use the back of a wooden spoon to mash the veggies in the strainer and squeeze out as much liquid as possible. Throw out the veggies and ladle your stock into freezer containers.


Honestly, it only takes 30 minutes or less of hands-on time. Other than that you just need to be around for a few hours while it simmers. This batch made about 15 cups of stock (which is the equivalent of about 10 cans that I would previously buy). It would have cost me at least $10-15 in the store but the veggies I used to make it myself added up to only a few dollars. Not only are we avoiding sodium, msg, and preservatives, but at the rate we use stock we're cutting over $20 a month out of our grocery bill. That's over $200 a year. Not too shabby.

Vegetable Stock
I find the first four ingredients the most important. I throw the others in if I have them on hand. If you're a carnivore, most general cookbooks should be able to give you instructions for a chicken or beef stock. Other than veggie,  chicken stock is what I make the most of. If you can't find a recipe, it's simple. Trust me. Use the bones of any chicken you've had recently. Cover with water and simmer for several hours. Skim foam off the top if it forms. Strain the solids out the same as you would for the veggie broth, let cool, and freeze.


1 large onion
3-4 cloves of garlic
2-3 carrots
2 celery stalks
5-10 mushrooms, rinsed
2-3 small potatoes
1-2 sprigs of parsley
1 baby leaf

Roughly chop the ingredients and combine in a large pot. Add about 16 cups of water. Bring to a boil and then simmer for several hours. When the flavor has developed and the color has deepened, remove from heat. Pour liquid into a large pot or bowl through a strainer, to remove the solids. Squeeze the solids with the back of a wooden spoon so that any remaining liquid will drip through the strainer. Discard the solids. Let the stock cool slightly, then ladle into freezer containers.


Thursday, 22 March 2012

How To Do Laundry On An Island

So I know that in a land far far away, most washers and dryers are inside. On good days, when I close my eyes, I can still conjure up in my mind that fairytale land from somewhere in the back of my fuzzy memories. Now I do laundry in a tiny apartment on an island. Or, rather, outside of a tiny apartment on an island. Some people do have indoor laundry. A lot of people do not. In fact, a lot of people don't have any laundry facilities. I'm not saying this is how everyone on islands does their laundry, but I'm speaking from my personal experience of nearly ten years and two islands. Here's how laundry is done in my life:

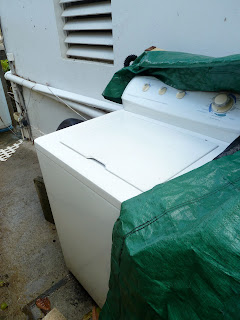
No telling what's taken up residence under there since the last load of laundry.
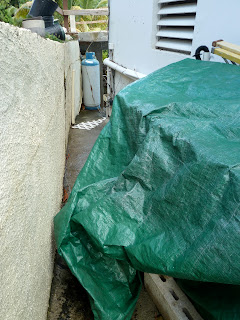
Step One: Go outside and remove the tarp that's on top of the washing machine. Be careful of any frogs or creepy-crawlies that have taken up residence in the tarp since the last load of laundry. Curse the gross dirty rainwater that was previously gathered in the fold of the tarp that you just poured all over your bare feet. Turn the machine on so that it starts to fill.


Whew! Safe from the creepy-crawlies. For now...
Step Two: Go back inside, slipping on the tile floor in the kitchen because of your now wet feet. Completely forget that you started filling the washing machine.


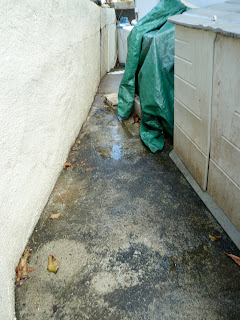
Watch out! Slippery concrete!
Step Three: Realize that the machine is now halfway through the first cycle. Run outside to stop it before the lid locks, but not so fast that you slip on the super slippery mildewed concrete outside. Fish out the bits of dirt and leaves that somehow managed to slip through the tarp into the machine and are now floating in the wash water. Once the bits of dirt and leaves are removed put in the detergent and the laundry.

Step Four: Try not to forget that you have laundry outside. The machine doesn't have a buzzer. If you forget for more than a few hours the laundry smells mildewy and is useless. Also, if you forget and it gets dark outside you have a whole new batch of frogs and creepy-crawlies that  have moved back into the tarp. They're even froggier and creepy-crawlier at night.


At least our laundry enjoys a good view.
Step Five: Hang laundry on the small line on the back porch. Pray that it doesn't rain while the laundry is drying. If the laundry takes more than a day to dry because of rain or damp air, it smells mildewy and is useless. Set up the drying rack inside for laundry overflow. Fill the drying rack. Continue hanging laundry on every door knob, window crank, and chair until it is all done.

Step Six: The next day, pull down the (hopefully) dry laundry. Repeat the entire process with the second load.

Extra Credit: In the event that a hurricane or tropical storm is on the way, do as much laundry as possible. Not only will there potentially be no power for an undisclosed amount of time (no power = no laundry) but you might as well use as much water as you can because the storm will refill the cistern.

Tuesday, 13 March 2012

How to Waste $12 and Five Hours

It started as a brilliant idea and potentially a second installation in the Fridge Door Project. It ended with over five pints of tomato jam that I don't really love. Five pints. Five jars mocking me from the kitchen counter every time I walk by. Sigh.

I was trying to decide what my next Fridge Door Project endeavor would be when I found a $5 basket of tomatoes at Fruit Bowl. If you don't know St. Thomas, Fruit Bowl is a magical place a store on island that has all the good stuff (fruit, vegetables, grains, beans, free-range chickens, etc.) without most of the bad stuff (cheetos, oreo cookies, fruit loops, etc.). It does have some processed foods, but on the whole it weighs far heavier on the good than the bad. All that plus the prices are about the same, and for some items cheaper, than the regular grocery stores. And it has these great $5 baskets of almost-past-its-prime produce. When the baskets are full of bruised apples or bananas I usually pass them up. We're just not super into applesauce or banana smoothies on a regular basis. When the baskets are full of 5-6 lbs of tomatoes or red peppers or eggplant, I snatch one up. (And I may or may not cackle happily to myself throughout the rest of my shopping, viewing my tomatoes kind of like that witch viewed those unsuspecting kids that stumbled into her gingerbread house. They don't realize they're about to be cooked up into something nice. I promise to call my psychologist friend as soon as this post is up.) So, a basket of tomatoes. That's the situation I found myself in this weekend.

There it is. Six pounds of tomatoes. After discovering an albino roach living in my kitchen scale, I used the bathroom scale to weigh them. The kitchen scale has been cast out of our family forever for harboring such an abominable creature. I don't mess around. (Our dog has considered himself warned.)
Last month I traveled up to Atlanta with a friend to help her out with something. (Something fun. More details on that hopefully next month.) The hotel restaurant both nights served adorable little mini-biscuits with tomato jam. It was insanely good. My thinking was why not try to turn these tomatoes into a tomato jam that I could use on hamburgers/veggie burgers in place of ketchup. I had all the ingredients on hand (for a recipe I've never tried before) including the 3 1/2 cups of sugar. It always amazes me how much sugar goes into jam. We don't use much sugar at all so we've made the decision to buy fair trade. It's about $7 for a small bag but we make it last forever. Except, apparently, when I'm making jam and basically the entire bag is called for. But I digress. Back to making the jam. So I cored the tomatoes and began to chop...


And I chopped...


And I chopped...


And I chopped...


For about an hour I chopped. Seth offered to come in and help but we only have one cutting board so I had to decline. (Note to self: buy another cutting board.) Then I threw all the ingredients into a pot and left it to boil for the required 1 1/2 hours. Not even close to jam consistency. Hmm... So I left it for another 30 minutes. Still liquid. A grand total of 3 hours later I finally dragged out my canning pot and the jars. After bringing a million gallons of water to a boil and putting the jars and lids in the sterilize them I was ready to start canning. I wasn't thrilled with the final taste or texture of the jam, but I was far too tired to care. I had started the whole shebang around 5:30pm and it was now almost 10pm. That's a lot of time spent on tomatoes. So I ladled the jam into the jars one by one and let them process in the boiling water bath for 20 minutes.

And now those five jars are sitting on my counter mocking me. I haven't put them away because I derive some sick satisfaction from giving the jam the evil eye every time I walk into the room. Whatever. It tastes fines. Some people might even love it. It's spicy and rich and has a little kick to it. But it wasn't what I was hoping for. Lesson learned. Make one jar first and see if I like it. I'll remember that on my next foray into tomato jam. But first Seth and I have five pints to eat.